Showing posts with label pe environmental. Show all posts

Thursday, 1 December 2022

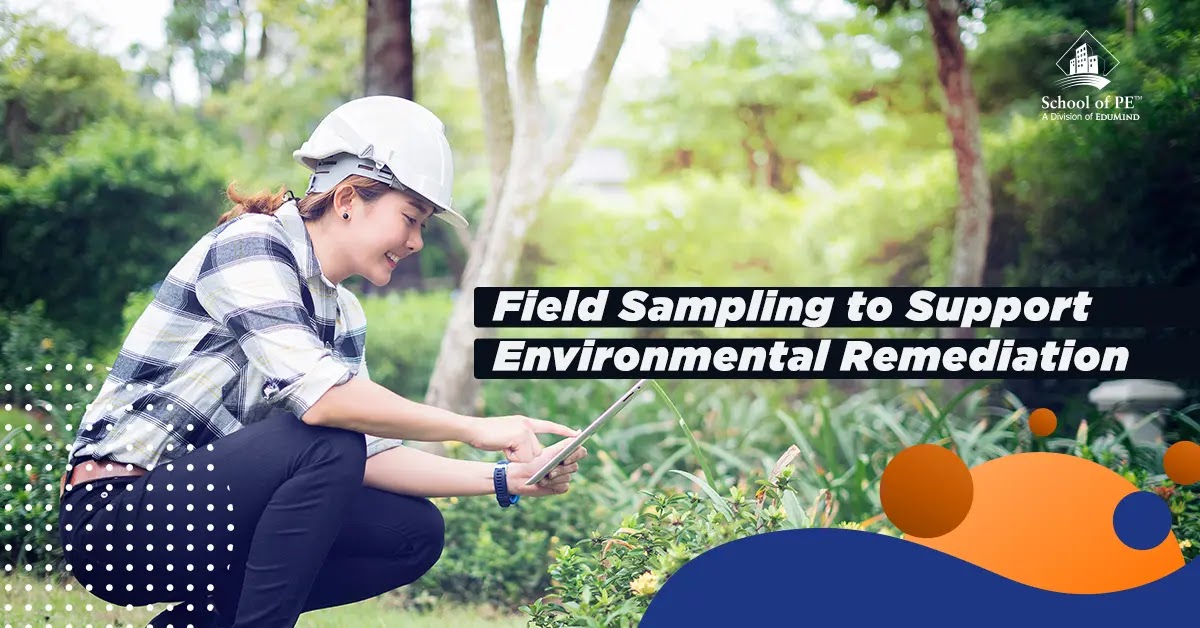
Field Sampling to Support Environmental Remediation

Are you interested in what remediation engineers do? As a remediation engineer, my work revolves around the cleanup and restoration of contaminated sites. There are many steps involved in remediating a site, which can take years from start to finish. The first step for remediating a site is determining the extent of contamination by conducting environmental field sampling.
Field Sampling to Support Environmental Remediation
1. Environmental Field Sampling
Environmental field sampling encompasses multiple media - soil, groundwater, sediment, surface water, or air. The media sampled is dependent on the site, its history, and whether any previous remedial investigations have been performed. Sampling data allows us to determine the nature and extent of contamination and to refine the conceptual site model to give us a better understanding of how the contamination occurred and to inform the remedy selection.
Environmental field sampling is a great introduction to remediation for any entry-level environmental engineer. By participating in field sampling, a new engineer learns both technical and leadership skills by managing a team, performing a task, and executing it to completion. Most of my field experience was spent groundwater sampling, so I'll talk you through what a typical week spent groundwater sampling is like.
2. Former Pesticide Manufacturing Facility Site
The site we are working on together this week is a former pesticide manufacturing facility. It's in a small, rural town, and the site is a large, empty parcel. The groundwater from the site is contaminated with chlorinated volatile organic compounds and semi-volatile organic compounds. It's also contaminated with some metals, including arsenic. This site is based on a site I manage in real life. When I started on this project over ten years ago, I was a junior engineer assisting with field sampling. I eventually became the field manager before being responsible for data interpretation and analysis for remedy selection. Now I am responsible for the remedy implementation, which has been very rewarding.
3. Sampling New Wells
Our job this week is to sample the new wells that were installed last month to help us delineate the extent of the plume which has extended off-site on neighboring parcels. Fortunately, we've confirmed through previous studies that this contamination doesn't extend to the deeper aquifer where residents get their drinking water.
4. Before the Sampling Event
First, we'll need to prepare for the sampling event. We will need to review the data from previous groundwater monitoring events to determine the clean-to-dirty order for sampling wells. Even though we clean all our equipment through a three-step rinse after each well is sampled, this step is still important since we'll want to minimize cross-contamination as much as possible.
We'll also need to order our equipment. The type of equipment we procure will depend on the site contaminants of concern (COCs) and depth to groundwater. But typically, we'll get a pump, water level meter, and water quality meter to help us monitor parameters as we sample, like temperature, dissolved oxygen, and specific conductivity. We will also work closely with the project chemist to determine the number of samples we'll need to take for what COCs and what quality control samples are needed.
We'll need to bring a site map, any logs, and labels for sampling, sampling bottles, sampling equipment, and a field kit, which will usually consist of a standard set of tools and random items like fishhooks (in case you drop something in the well and need to fish it out - it certainly happens!).
We'll also need to make sure we have 55-gallon drums at the site to containerize our purge water from each well. This purge water is tested separately to help us understand whether it is hazardous or non-hazardous waste, which determines what kind of landfill the drum is transported to.
We'll also need to make sure we bring all our safety gear. This typically includes the site-specific health and safety plan (HASP), safety glasses, nitrile gloves, and steel-toed boots. Depending on the site conditions and/or client, we may also need to bring a hard hat, hi-visibility vest, or other safety gear. For the site we're sampling at together this week, we don't have any client-specific safety requirements. However, we'll want to bring snake chaps and steel-toed rain boots since the site gets very soggy when it rains. We will also bring light, breathable clothing for our time spent in the sun, along with a hat, sunscreen, and insect repellant with DEET.
5. Upon Arrival
Once we drive to the site, we'll have a health and safety tailgate meeting and talk about the potential hazards we might encounter. Today this means heat stress and biological hazards (snakes, friendly ticks desperate to hitch a ride, mosquitoes, and fire ants and wasps that love setting up real estate right next to the wells). It's supposed to rain today, so we'll need to be careful about driving around the site. We've gotten the truck stuck in mud before on this site, and the nearest towing company is 30 minutes away.
We start our day by conducting a synoptic gauge. This means we'll measure the depth to water in each well, along with the total depth of the well (if needed). This will help capture the potentiometric surface of the aquifer(s) we are collecting samples from. We will also use this synoptic gauge to perform an inspection of the monitoring wells to determine whether any need repairs. For example, are any locks missing? Are the concrete well pads cracked? Are there any wasp nests inside the well? We've learned to open well caps from behind for that reason - it's a nasty surprise to open a well and have a wasp fly in your face.
6. Recording Water Quality Parameters
Once we are done with the synoptic gauge, we'll start sampling with the cleanest well first. Once we set up the pump, we'll write down water quality parameters (typically depth to water, temperature, specific conductivity, turbidity, oxidation reduction potential, and dissolved oxygen) at predetermined intervals (usually every 3 to 5 minutes). With low-flow sampling, we'll need to keep the flow generally between 100 to 250 milliliters per minute to avoid stressing the aquifer and to collect a representative sample. Once our readings are generally consistent, it means that the well is stabilized and we can collect a sample. We'll want to make sure our samples are collected per the standard operating procedures for the project and/or client.
Once we are done collecting our samples, we'll clean our equipment using a three-step rinse. Then it's time to tidy up, dump our purge water in the 55-gallon drum, and head to the next well.
7. Groundwater Sampling
Groundwater sampling is fun but can consist of long, tiring days. For the site we're working on together, we have to wake up early to beat the heat. We also have to ship samples every day. The closest FedEx is 30 minutes away, and the last pickup is at four. Packing the coolers to ensure the samples arrive safely and within temperature requirements (i.e., lots of ice) takes time and care, and making sure the cooler is delivered on time before the last pickup is a daily adventure.
8. Flexibility During Fieldwork
Field work means thinking quickly when something goes wrong. Did the pump break? Learn to fix it. Is the site muddy? Time for someone to walk a path to the wells to make sure the site is drivable. Is a baby cow trying to eat your well keys, or the cows won't move out of the way? (You'd be surprised how obstinate and belligerent cows can be, even with a truck honking at them to move out of the way). You can't find a well? Have to fish out tubing that fell into the well? Are random people wandering on site and into your workspace? Did the well go dry and is no longer producing water? Is there a large swarm of bees heading your direction while you are sampling? All of these are things that have happened to me in the field. Learning to react quickly to solve problems is a necessary skill for success.
Conclusion
After a long week, we've sampled our last well. We cleaned up and containerized our trash and collected composite samples of the purge water. We drop off samples at FedEx and drive back home, accomplished and eager to see the data so we know what the next steps are.
And what are the next steps? We'll likely need to continue monitoring so we have enough data to determine trends. As we get a better idea of plume stability and data trends, we can start evaluating potential remedies for the site. Depending on the data trends, COCs and concentrations, and cleanup requirements set by the applicable regulatory agency, the remedy can be anything from monitored natural attenuation (which relies on physical, chemical, or biological processes to reduce the concentrations of contaminants without an active remedy), to groundwater injections which involve injection of an amendment to chemically break down the contaminants. There are many different groundwater remedies that can be selected for a site which we'll discuss for the next installment!
Do you want to pursue a career in environmental engineering? Consider partnering with School of PE, a leading exam prep provider, to help you succeed with confidence!

About the Author: Jennifer Stark

Jennifer Stark is an environmental engineer and is licensed in the state of Texas. She works from home in Indiana, where she lives with her husband and feisty dachshund/canine coworker. In her free time, she enjoys craft projects, playing music, and complaining about the cold weather.

Friday, 25 March 2022

10 Reasons You Might Have Failed the Environmental PE Exam

As someone who took the Environmental PE exam multiple times before passing, I understand how devastating it is to fail. You've told everyone you know about your exam - your loved ones, friends, and coworkers. Failing the exam after spending so much time and money preparing is embarrassing and disheartening.
Trying to figure out what went wrong? Here are ten reasons why you might have failed the Environmental PE exam.
10 Reasons You Might Have Failed the Environmental PE Exam

1. You didn't study and underestimated the exam difficulty.
Life happens. For whatever reason- work or personal- you didn't find time to study. The weekend before the exam, you grabbed your prep material and furiously flipped through the pages. You spent the week of the exam studying several hours after work, your heart pounding as you realized there was more material to cover than you thought. You tell yourself that the exam's reference handbook will help you with any problems you can't figure out. And if your coworker was able to pass with just a week of studying, you can too, right?
I made this same mistake on my first exam. I had started preparing about five weeks before the exam, thinking I could rely on my reference material to help me if I got stuck on a problem. What I didn't anticipate was how difficult the exam problems would be, and that the references wouldn't help me if I didn't understand the basic principles required to solve the problems in the first place.
2. You're not familiar with the exam specifications.
If you didn't understand the breakdown of topics covered on the exam, then passing the exam is not possible. Figuring out which topics are covered prior to exam day is vital so you have time to prepare. NCEES provides a breakdown of topics covered on the exam, down to the number of approximate questions for each topic. Review this exam specification to determine what areas you will need to focus for your next exam attempt. As a remediation engineer, I knew that I had to spend more time studying water and air, as these topics comprised a higher percentage of the exam questions than remediation.
3. You're studying, but not the right material.
It's easy to fall into the habit of skimming old college textbooks. Without having a dedicated study plan, it's hard to stay focused on studying the right material. Use the exam specifications and your diagnostic report to determine your weaknesses. Then focus on strengthening any weaknesses in those topics with your prep materials. Remember - the more problems you work, the more you strengthen your understanding of the topics.
4. You don't have a solid study plan.
My biggest weakness my first two exam attempts was studying aimlessly, sitting on my couch, and reading textbooks without working actual problems. For my third and successful attempt, I used my diagnostic report to figure out my biggest weaknesses (air and water) and scheduled study sessions at my kitchen table every night. Figure out how much study time you need for preparation and where you can study to maximize your study sessions (i.e., Do you focus better from a quiet spot or with ambient noise?) Aim for consistency by studying in small chunks having a solid study session for an hour is better than sitting at your chair for four hours and not being able to focus.
5. You have work distractions/life commitments.
We are all adults with jobs and commitments. Even if you prepare a study schedule, you may not be able to devote all the time you planned due to personal or work commitments. If you have an upcoming major life event, my advice is to postpone the exam until you are able to focus on studying. I was planning my wedding my first two exam attempts, making it difficult to focus on studying. Once I got married and no longer had to spend so much time and energy on planning my wedding, I was able to prepare for the exam. I passed the exam six months after my wedding.
6. The exam covers topics you do not have professional experience with.
My work involves environmental remediation-I assess contaminated sites, use analytical data to determine where the contamination is and at what levels, and what can be done to clean it up. I don't perform any water resources engineering or work with air pollution with my work, which are major components of the Environmental PE exam. According to my diagnostic reports, these two categories were my weakest. I took a prep course to deepen my understanding of the material and practiced as many problems as I could for my successful attempt.
Chances are, you are pretty comfortable tackling problems within your specific environmental discipline. I did not spend much time studying for remediation problems since I felt pretty comfortable with the topic. Instead, I focused the majority of my study in topics with which I was not as familiar. Figure out where your weaknesses are so you can focus on those during your study.
7. You have test anxiety.
The week leading up to the exam fills you with dread and you can hardly sleep the night before. On exam day, your heart is beating wildly, and you can barely focus. The questions swim in front of you as you struggle to discern what they are saying.
Test anxiety is not easy to deal with, especially if you've already failed before. You may not think you are good enough to take the exam and believe that failing again is inevitable. What can you do?
While preparing for the exam, be sure to set aside time to work through practice exams for multiple sessions. Work through the practice exam and simulate the test taking environment as much as you can - that means using only the Reference Guide to solve the problems, timing yourself as you work through the problems, and minimizing as many distractions as you can. We tend to feel anxious about situations that are unfamiliar to us. By simulating the test-taking environment in your home, you are able to both study for the exam and become more relaxed with what the test-taking experience feels like. Don't despair if you fail the practice exam (it happens to all of us, myself included) just figure out what mistakes you made and practice the problems you missed.
Make a list of things that will help you feel better about the exam. Listen to a playlist of good tunes to prepare. Figure out your test day plans (lunch, parking) to minimize stress. The day before the exam, treat yourself to a nice dinner and take the day off if you have the opportunity. Remind yourself of how far you have come in your life and how many obstacles you completed to become an engineer  engineering school, the FE exam, and interviewing for your job. You've already completed the hardest steps to get to this point. Just eight more hours stand between you and the license!
8. You have been out of school for a long time.
I passed. FE exam in 2007 but didn't take the PE exam for the first time until ten years later. As you can imagine, there was a lot of material I'd forgotten about. If you have been out of school for a long time, give yourself extra time to study and reacquaint yourself with the core concepts. Make sure you procure solid preparation materials to aid your study (see #9).
9. You didn't have the right prep materials.
If your study material consists solely of fifteen-year-old class notes, you will need to reassess your study strategy. You will want to procure materials that are aimed at preparing specifically for the exam - think practice exams, practice problem books, and prep courses. There's certainly nothing wrong with using class notes to study but be sure you are finding quality materials that consist of practice problems with a difficulty like what is covered on the exam.
I understand how expensive prep materials and classes are. If these materials are outside of your budget, don't worry - there are options! Ask coworkers if you can borrow their exam prep textbooks. Some employers will cover the cost of a prep course - see if yours will. If you're part of a professional organization like ASCE, those organizations might offer prep classes as well.
10. Not being mentally prepared on the day of exam.
Taking an eight-hour exam is mentally demanding since you are sitting and focusing on difficult problems all day long. Don't underestimate the care your body and mind need the day of the exam. If you are staying up late and studying until midnight, you are not going to feel at your best for exam day. My personal recommendation is not to study the week of the exam. You wouldn't want to run twenty miles the week of a marathon; similarly, you will want to give your body and mind time to rest for the exam by resting and not studying.
It can be difficult to sleep the night before, especially if you are retaking the exam. I had a challenging time sleeping the night before my passing attempt. I used advice that my old running coach had told me - if you get a good night's rest two days before a race, then that rest will cover any missed rest the night before a race. I'm not sure how true that actually is, but I used that advice to feel better about missing sleep the night before my test.
If you take your time to consider why you failed the exam, you can better prepare for your next exam attempt and pass the Environmental PE exam.
About the Author: Jennifer Stark

Jennifer Stark is an environmental engineer and is licensed in the state of Texas. She works from home in Indiana, where she lives with her husband and feisty dachshund/canine coworker. In her free time, she enjoys craft projects, playing music, and complaining about the cold weather.

Friday, 31 December 2021

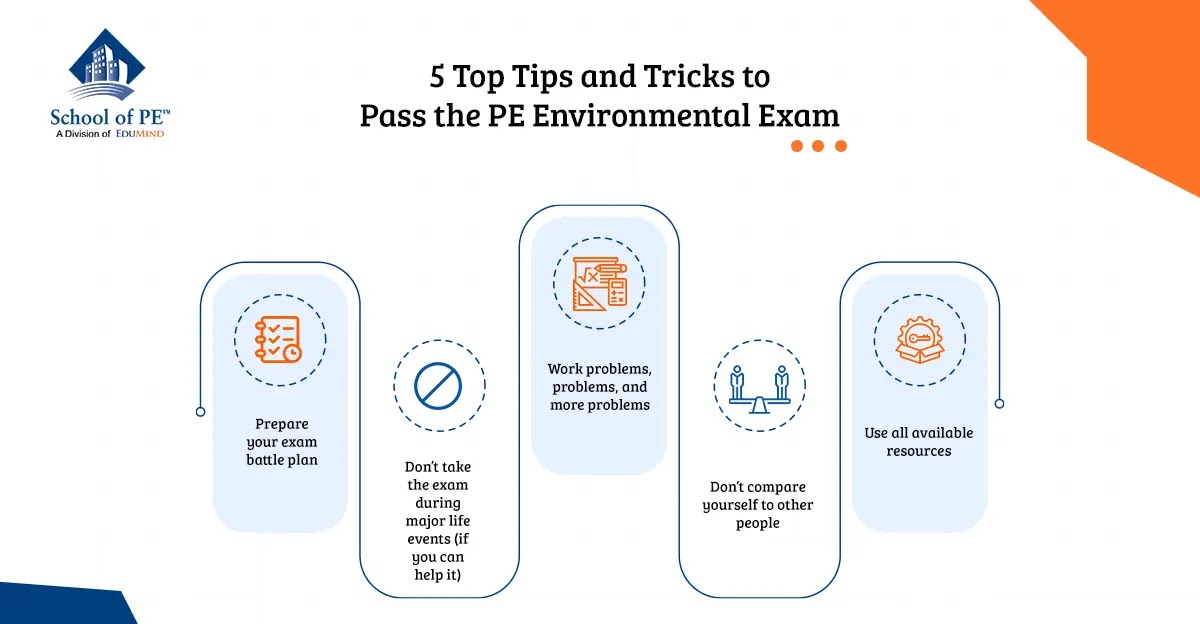
5 Top Tips and Tricks to Pass the PE Environmental Exam

It's no secret that the PE Environmental exam is difficult. If you are curious about taking this exam or haven't passed it after multiple attempts, you're not alone-in fact, the exam took me three tries to pass! In this blog, I will share why I believe I didn't pass my first two times as well as the tips that aided in my eventual success.
Even though I was getting ready to take the last pencil-and-paper PE Environmental exam before it transitioned, these tips will also apply when preparing for the computer-based testing (CBT) exam or even a completely different discipline altogether.
The First Two Tries
When I took the PE Environmental exam for the first time in April 2017, I had been out of school for nearly ten years and had to refresh my skills on many topics. I decided to start studying five weeks before the exam, spending my evenings preparing on the couch while my fiance watched TV. I didn't work through many problems-I thought having a good grasp of engineering theory was all I needed.
When results came out the next month, I saw the dreaded red box on the NCEES website: I had failed. Undeterred, I signed up for the next exam. Since I'd been close with my first attempt, I thought I should be able to pass with no problems! I continued studying and reading my engineering books to get a conceptual understanding of the material.
I was devastated when I learned I had failed a second time - and with an even lower score.
How was this possible?
The Third (Successful) Try
When I walked out of my testing site the third time, I felt confident but also concerned that somehow, I could have failed this exam again. As soon as I heard results had been released, I sat on the couch and made my husband sit next to me for emotional support as I logged into the NCEES website. Words cannot describe the feelings of pride and elation I experienced when I saw that green box indicating I had passed. My journey to becoming a PE was finally over! Celebrating this milestone is one of my happiest memories.
Now, you may be wondering, how did she do it?
After spending time not only processing but also grieving my two failures (which involved a lot of retail therapy and sweets), I ended up completely overhauling my study technique and preparing to start a new journey to success. I have summarized this plan into the following five steps:
5 Top Tips and Tricks to Pass the PE Environmental Exam
Tips for Success
1. Prepare your exam battle plan.
If you're going to conquer this exam, you need a solid battle plan-and the first component of any successful plan is a schedule. Plan a realistic study schedule that you will feel comfortable achieving by the test date. I knew that for my third try, I wanted to study for six months and/or for 200 hours (note: this number will be different for everyone). I started studying slowly and ramped up the intensity with each passing month. By the last month, I was studying both before and after work.
Everyone is different (see Tip #4) so just because someone else studied X hours, it doesn't mean that you need to study that same amount to pass the exam. You know your study habits and motivators, so focus and rely on what you know will work best for you. I knew that I would feel anxious about my chances of passing the exam unless I met my study goals, so I kept a spreadsheet of my study hours to hold myself accountable and give myself the additional peace of mind that I was meeting my targets.
An important component of a study schedule is rest. If you're keeping track of your study hours, increasing the duration of your study sessions can be tempting, especially as you get closer to the exam date. Be mindful of taking breaks and resting-sitting in a chair for three hours when you're unfocused and exhausted is not productive. Take breaks, grab a bite to eat, or try moving around until you feel more energized. Be sure to build rest days into your plan.
The next component of your battle plan is study location. Unless you live by yourself, you're likely sharing your home with other people like your spouse, roommates, children, and/or parents, etc. Now, finding alone time to study may be challenging. During my third attempt to pass this exam, I knew I could not study in front of the TV anymore. Although the empty spot on my couch taunted me every night, I lugged all my books to our kitchen table, opened Spotify's "Perfect Concentration" playlist, and studied there. Minimizing my distractions helped me focus on the material and I had much higher quality study sessions.
Maybe studying in your home is too distracting for you. Can you pick a quiet conference room at work to study during lunchtime? Or maybe you need background noise to study, like in a coffee shop. Again, you know yourself the best. Consider your study habits and needs and ensure you are studying in an environment that is optimal for your learning.
The last component of your plan is making sure you are ready for exam day! Choose a date that you will stop studying and stick to it to give yourself a mental break. Just like you wouldn't want to run a 10-miler the day before a marathon, you want to make sure you're mentally refreshed before taking this exam. For my last attempt, I stopped studying early in the week and even took the day off before the exam to sleep in, work on a craft project, and relax.
For the day of the exam, do you know where the testing site is? Where parking is? Whether you are able to bring lunch on-site? What time you need to report to the exam site? These are all details that you should figure out well in advance of the test date to avoid any unnecessary surprises. Read the NCEES Examinee Guide carefully to ensure you're not bringing anything inside that may break the rules.
For my last attempt, I had my husband drop me off at the exam site. We had a hard time finding the parking lot since the gates all appeared to be closed, and based on how many cars we saw circling the site, we weren't the only ones. Finally, he dropped me near a group of confused examinees standing next to a fenced area. We may or may not have had to physically roll our suitcases and ourselves under a gap in the fence to get inside the testing center. You want to avoid these fun surprises on the day of the exam.
2. Don't take the exam during major life events (if you can help it).
While preparing for my second attempt in October 2017, I was six months away from my wedding and was busy with planning. We took our engagement photos three days before my exam. As you can expect, it was hard to focus on exam preparation while planning a wedding at the same time.
After I failed twice, I considered when to retake the exam. The next available exam date would be just a week after my wedding. I couldn't imagine juggling the final months of wedding planning and studying for the exam at the same time or sitting for the exam before I could even go on my honeymoon. Instead, I decided to put off my next attempt so I wouldn't even have to think about the exam until after I returned from my honeymoon.
I have no regrets with this decision-it allowed me to enjoy the final, frenetic stages of wedding planning with my husband and focus my efforts on decisions that really needed my undivided attention (Kelly or Moss Green napkins?) Once I returned from my honeymoon, I felt refreshed and ready to tackle the exam again.
I know life can throw us curveballs (pandemic, anyone?) and that you can't plan for everything. But if you already know that you have a big life event planned for a certain date (wedding, moving, etc.), really consider the timing of your exam.
3. Work problems, problems, and more problems.
I didn't work on many problems while preparing the first and second time. For my passing attempt, I scrapped what I had done before (reading engineering theory) and instead focused on practicing as many problems as I could-problems from textbooks, problems from the internet, I did them all. If a problem confused me, I'd consult my textbook to gain a better understanding of the material.
As my exam date crept closer, I started practicing my test-taking strategies while solving each problem and reworking problems until I could solve them easily. For example, I'd work through each problem as if I were taking the test using the resources available to me, instead of stopping to look up the answer. I practiced problems with my binder material. Now, though, since many of the exams are CBT, it will mean solving problems using solely the Reference Handbook. Make sure you have a good understanding of what formulas are included in this handbook and practice using it electronically while working through problems. You do not want to wait until exam day to review the Reference Handbook for the first time.
The more problems you do, the more you broaden your understanding of the topics. In fact, working through problems will increase your chances of passing. While taking my third exam, I encountered plenty of problems that I initially found confusing, but eventually felt comfortable answering due to the variety of problems I had prepared with.
If you've previously failed the exam, study your diagnostic report to determine your weaknesses. My personal career is in remediation, so I felt confident with that topic. But air and water? Not so much. I decided to focus my study on those two topics where I had been struggling.
4. Don't compare yourself to other people.
You surely have heard stories of examinees waiting until a week before the exam to study, skimming through their materials, and passing the first time. These people do exist and are infuriating, especially if you studied longer and still failed. I remember the smile I faked when one of my coworkers expressed how he had passed despite putting forth exceptionally little effort.
Remind yourself that everyone is different. Like I mentioned in Tip #1, craft a battle plan that is right for YOU. And if you're retaking the exam, don't be hard on yourself-many of us have had to retake this exam multiple times. Focus on strengthening your weaknesses and continue working actively towards your goal.
5. Use all available resources.
Take practice exams! Borrow prep materials from coworkers! Sign up for an exam prep course (and see whether your company will reimburse you for the expense)! Try studying with colleagues or friends!
During the preparation for my third attempt, I worked through practice exams and used old practice problems that colleagues had given me. I also frequented a forum called Engineer Boards when I needed help with questions that stumped me, test-taking advice, and/or general camaraderie. Knowing that I wasn't alone was a confidence booster!
With a strong battle plan and focused study, you too will see the green box that indicates your success in achieving this milestone. Good luck on your journey to becoming an Environmental PE!
About the Author: Jennifer Stark

Jennifer Stark is an environmental engineer and is licensed in the state of Texas. She works from home in Indiana, where she lives with her husband and feisty dachshund/canine coworker. In her free time, she enjoys craft projects, playing music, and complaining about the cold weather.


Monday, 11 May 2020

The Truth About Sustainability

Sustainability is a current theme among all engineering projects in today's world. This poses a challenge to engineers to design projects that encompass varying degrees of sustainability. 
According to the Environmental Protection Agency (EPA), sustainability is a simple principal premised on the balance between humans and nature. The overarching goal is for both to thrive harmoniously together in the present and future. 
There are many different definitions given to sustainability, and this adjective is dependent on factors including organization goals and stakeholder interest and input. 
According to youmatter.world, sustainability can be defined as the processes and actions through which mankind avoids the depletion of natural resources to keep an ecological balance so that our quality of life is not jeopardized. Youmatter goes on to explain that sustainability embodies three core pillars: economy, society, and the environment. These pillars are more informally seen as profit, people, and the planet. 
Historically, the National Environmental Policy Act (NEPA) of 1969 committed to sustainability by declaring it a national policy to create and maintain balance and fulfill the social, economic, and other requirements of the present and future, according to the EPA. Currently this topic has broadened, leaving way for varying influences and drivers. 
Sustainability encourages businesses to frame long-term decisions based on the three core pillars. This is opposed to the short-term goals of most businesses: profitability. According to Investopedia.com, a company's sustainability goal can be a commitment to zero-idling in company vehicles to reduce emissions by a certain percentage or ensuring that physical waste is disposed of properly to minimize the carbon footprint. In actuality, sustainability within companies began as an ethical response to public perception over "the long-term damage caused by a focus on short-term profits," Investopedia explains. 
Sustainability is a complex process. It can certainly involve higher upfront cost to implement efficiency and renewable sources, but this is more beneficial in the long run. Sustainability is most evident in energy generation. Electrical companies are moving toward sustainable sources such as wind, hydropower, and solar. Water infrastructure companies are focused improving water quality and exploring techniques for treatment that are environmentally friendly. 
The Truth About Sustainability
Even though the framework of sustainability is positive, some experts argue that it is counterproductive and that there are little to no benefits for the environment. This is due to the green movement which promotes sustainable development. To be sustainable is to preserve and protect; to develop is to build or grow. The two words "sustainable development" together are misleading and represent two opposite ends of the spectrum. How can one grow and sustain? 
It is said that sustainable development excuses corporations, governments, and societies at large and it is truly enabling the destruction of the Earth. How can renewables save the Earth from future annihilation anyway? There is still the ever-present concern that habitats, the ecosystem, and the environment are all compromised with land development. So, instead of campaigning for sustainable developments, we should be advocating for sustainable nature that protects wild spaces, the entire ecosystem, and the species within these areas. This is when true sustainability happens.

Monday, 20 April 2020

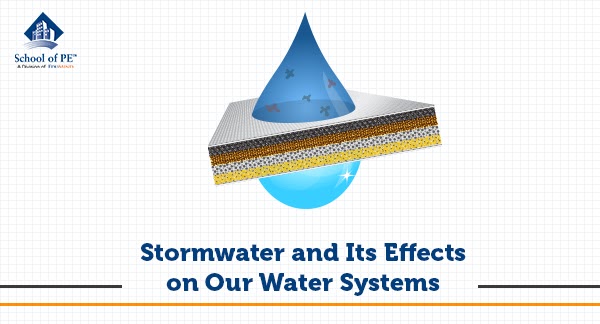
Stormwater and Its Effects on Our Water Systems

When rain or other forms of precipitation fall to the earth in undeveloped areas, it typically soaks into the ground and/or is soaked up by surrounding vegetation. Any water that drains into nearby water systems is of good quality and does not have as many negative effects on the environment. However, this is a different story in urban areas, where most surface types are impervious (does not allow water to pass through). This includes parking lots, roofs, and some soils in developed areas due to compaction. This change in the surface type from pervious to impervious has negative effects on water systems, which are very dependent on their respective watersheds. Watersheds are drainage basins or any area where precipitation collects and drains off into a common outlet (any other body of water). Water that flows overland in urban areas is called stormwater. 
Stormwater and Its Effects on Our Water Systems
Stormwater is precipitation that flows over the ground in developed areas. This water flows over roadways, parking lots, and rooftops carrying oil, grease, and many other pollutants with it. Stormwater ultimately discharges into sewer systems and/or waterbodies causing water quality issues and negative effects to the ecosystem. Stormwater runoff contains pollutants such as fertilizer, which contains both nitrogen and phosphorus. These two are naturally present in everything, but this excess along with high velocity rainwater endangers the environment. 
Stormwater velocities can be high and are expected to become higher due to the effects of climate change. Climate change causes an increase in the severity and frequency of major storm events, which mean a significant risk for flooding. Frequent flooding destroys aquatic habitats and displaces many species from their natural environment. Flooding also causes water in sewer systems to overflow carrying pathogens, excess nutrients, heavy metals, and other toxins. This is a threat to the public health and environment. These pathogens can also be carried to drinking water supplies and swimming areas, causing a myriad of disease-causing microorganisms. Toxins in stormwater also cause an increase in algal blooms that suffocate and kill aquatic life. Stormwater causes a decrease in stream base flows; natural flow characteristics have changed due to urbanization. Also, water is not supplied to underground aquifers. Having impervious surfaces means that water can no longer infiltrate into the ground and recharge the groundwater supply. 
Traditionally, water infrastructure such as storm drains and culverts are used to receive, convey, and discharge stormwater through a series of pipes into receiving water. Now, green infrastructure is becoming a more common practice of treating stormwater, which is more beneficial to the environment and the economy. Green infrastructure includes methods that capture rainwater, treat it, and discharge it at lower rates. This is accomplished with more natural stormwater management practices, including permeable pavement, green roofs, and rain gardens. Green infrastructure uses soil and vegetation to mimic the natural hydrologic process through infiltration and evapotranspiration. The goal of green infrastructure is to preserve natural features and minimize impervious surfaces. 
References:

Monday, 23 March 2020

Permeable Pavement: Stormwater Management

Stormwater is a major source of pollution in urban areas. When rain falls onto impervious surfaces (roofs, roads, and parking lots), stormwater drains into sewers and is discharged into water systems carrying pollutants (like oil, trash, and bacteria) with it. These impacts are long lasting and damaging to the environment. However, this is not true for undeveloped areas, where rainfall is infiltrated in the soil and soaked up by plants through evapotranspiration. In such an environment, stormwater is much cleaner and has less of an environmental impact. As a result, green infrastructure was introduced into urban areas as an approach to manage the impacts of stormwater runoff. Section 502 of the Clean Water Act defines green infrastructure as "...the range of measures that use plant or soil systems, permeable pavements or other permeable surfaces or substrates, stormwater harvest and reuse, or landscaping to store, infiltrate, or evapotranspirate stormwater and reduce flows to sewer systems or to surface waters." In essence, green infrastructure reduces and treats stormwater at its source. 
Permeable pavements are considered to be an effective, resilient approach to managing excess stormwater runoff. Permeable pavements such as pervious asphalt, pervious concrete, interlocking pavers, and plastic grid pavers infiltrate, treat, and/or store stormwater. Some of these systems are designed to carry stormwater and discharge offsite using perforated pipes. Permeable pavements help reduce the need for road salts used for deicing, restore groundwater supplies, and reduce construction costs by limiting the need for traditional drainage structures. 
Permeable Pavement: Stormwater Management
Although permeable pavements provide great benefits as a low impact to the environment; there are limitations to this method. Permeable pavements have a high potential for clogging, dirt, and debris because of the high void space within the pavement system. Special maintenance measures would be required, such as vacuuming or high-pressure washing. There are also great variations from traditional construction practices. The vast majority of permeable pavement projects are designed to carry light vehicular traffic. These are recommended for low-volume roadways, parking lots, pedestrian walkways, sidewalks, driveways, bike lanes, and shoulders. It is often a challenge to use these types of pavements for highways due to varying soil conditions, utilities, fills, and slopes. However, with good engineering design, permeable pavements are possible for roads with heavier traffic loading. 
There are three major design considerations for permeable pavement: 1) site design considerations to ensure that the site is acceptable for this method; 2) hydrologic design to ensure that the permeable pavement will meet the stormwater runoff needs; and 3) structural design to ensure that the permeable pavement will meet the traffic loading demands. Additional site considerations include soil types, depth to bedrock, pavement slopes, and other sources of runoff. The hydrologic design determines the layer thickness requirements that will infiltrate, store, and release the expected water. This requires knowledge of the subgrade permeability and rainfall intensity data. Typically, structural design of permeable pavements is for light loading. For those requiring heaving traffic loading, the 93 AASHTO design procedures should be used as well as incorporating some traditional pavement methods.

Thursday, 5 March 2020

NPDES Permitting 101

If you work in the Design or Construction industry, you've heard of the National Pollutant Discharge Elimination System (NPDES) permitting. Many projects require an NPDES permit and this is all dependent on specific project parameters such as the scope of work, proximity of the project, and/or the potential adverse effects to the environment. This permit is administered through the Environmental Protection Agency (EPA) and regulated through authorized state agencies. In areas where states do not have a regulatory agency, the EPA governs. The overall goal of the EPA is to protect the environment-land, air, and water. 
The NPDES permit program was created by the Clean Water Act (CWA) of 1972. According to the EPA, this program is used to address water pollution by regulating point sources that discharge pollutants to water of the United States. Broadly defined by the EPA, a point source means any discernible, confined, discrete conveyance. Point sources include pipes, ditches, channels, tunnels, and conduits. Water pollution includes any type of pollutant introduced into water systems. This can be industrial, municipal, and agricultural waste discharged into US waters, which includes those that are navigable, tributaries to navigable, interstate, intrastate, and oceans out to 200 miles. 
NPDES permits specify the acceptable level of pollutants in a discharge. This permit or license ensures that permittees select best management practices to meet the state's mandatory standards and federal minimums. Best management practices are simply treatment techniques; they define how the permittee will maintain acceptable levels of pollutants during land-disturbing activities, which can be caused by industry, mining, agriculture, and construction. There are two types of NPDES permits: induvial permits, which are specific to the site; and general permits, which cover a group of discharges with similar qualities. The construction general permit is required at construction sites with land-disturbing activities of one acre or greater. The permit can also be required if the site falls within a certain geographical location (such as a watershed) and/or proximity to the regulated waters of the state. 
During construction activity, soil is disturbed leaving loose soil exposed without vegetation. When it rains, stormwater washes over the bare soil at construction sites and carries it along with other construction pollutants such as fuel, debris, and other chemicals, to point sources. This ultimately produces water pollution and has adverse effects on the environment because soils and construction waste that wash into water systems negatively affect aquatic ecosystems. 
NPDES Permitting 101
To be covered under a construction general permit, the permittee must file a notice of intent (NOI). This is an electronic public document filed through the EPA or state regulatory agency and provides notice to the agency that the entity (owner or operator) intends to be covered under the general permit. NOIs contain basic information regarding the site, land-disturbing activities, and the proposed discharge. In environmentally sensitive areas, the permittee is required to submit additional information such as a stormwater pollution prevention plan.

Thursday, 20 February 2020

Full Depth Reclamation: Sustainable Pavement Rehabilitation

According to the 2017 ASCE Infrastructure Report Card, our nation's roadway infrastructure is in poor condition. There is an ever-increasing backlog of rehabilitation needs with minimal resources. In fact, this underfunded system needs approximately $420 billion to repair roadways. As our nation's infrastructure continues to decline, agencies are tasked with maintaining and rehabilitating roads with shrinking budgets and costly construction. With that, engineers must explore cost-effective, sustainable techniques to maintain and rehabilitate pavement. 
One such technique is full-depth reclamation (FDR). It is typically 25% to 50% less expensive than removal and replacement and could be an answer to help improve our nation's roadways. The FDR method involves using a road reclaimer to pulverize the existing base and asphalt, mixing the material with cement and water and compacting it in place with rollers. Asphalt or concrete is used as the surface material. The results are a stronger, more uniform and moisture-resistant pavement system. 
FDR is known to increase the structural capacity and durability of the pavement structure, decrease the construction schedule, reduce impacts on the public due to construction, reduce the carbon footprint, and increase the life expectancy of the pavement. The materials used are reduced since the existing pavement remains in place unless some portion of material is removed to maintain a specific elevation. The stiffer base exhibits characteristics of a slab, and there is a reduction in deflections caused by traffic loading, thus extending the pavement life. 
There are three types of FDR stabilization methods: mechanical, chemical, and bituminous. Mechanical stabilization is when the existing pavement and base are pulverized, mixed with granular aggregate, crushed concrete, or recycled asphalt pavement (RAP), and compacted. This method relies on particles of the granular aggregate and pulverized mixture to interlock. Chemical stabilization is the most common method. This is when the existing material is pulverized, and a chemical is added with water and compacted. The most common materials added are Portland cement, lime, and Class C of F fly ash. Bituminous stabilization is achieved when the pulverized asphalt and base are mixed with an emulsified asphalt or foamed asphalt. 
Full Depth Reclamation: Sustainable Pavement Rehabilitation
Most roadway systems are good candidates for FDR. Roads that have excessive rutting, patching or alligator cracking in the wheel path, or show signs of base failure are all good reasons to consider FDR. However, there are some instances when FDR alone will not fix the issue, such as projects that have drainage problems (like saturated subgrade). FDR can still be done, but geotextile fabric should be incorporated into the design. All in all, agencies must perform extensive pavement condition surveys and try to determine the causes of distress before FDR is chosen. Other factors to consider are future traffic loads and the location of existing utilities. The FDR process and pulverizing equipment can exceed 18 inches in depth, so having a clear picture of where these utilities are prior to design is important. 
Reference Links:
https://www.cement.org/docs/default-source/fdr/guide_to_fdr_with_cement_jan_2019.pdf

Thursday, 29 November 2018

Pros of Wind Energy: Wind Turbine Statistics

Renewable energy is trendy, and for good reason. Throughout the past few years, there has been a big push to make the world cleaner. Consumers are purchasing more eco-friendly vehicles, recycling more often, and using more natural cleaning products. 
When it comes to saving energy, wind turbines can help immensely. Did you know the average efficiency of a wind turbine creates enough energy for 500 homes? Check out some more wind turbine statistics in the infographic below. Although they may be loud, there are many pros of wind energy thanks to environmental engineering!
Pros of Wind Energy: Wind Turbine Statistics
References
How powerful is wind energy? Retrieved from https://www.ecotechinstitute.com/ ecotech-news/how-powerful -is-wind-energy
Johnston, A. Wind Energy Economic Benefits Highlighted In AWEA Infographic. Retrieved from https://cleantechnica.com/ 2014/08/31/wind- energy-economic-benefits-infographic/ 

Wednesday, 14 November 2018

Which Exam Should You Take? PE Civil: Water Resources and Environmental vs PE Environmental

If you are interested in environmental engineering and want to become professionally licensed, you may be wondering which PE exam to take. NCEES offers two different environmental exams for professional licensing: PE Civil with a Water Resources and Environmental Depth, and PE Environmental. 
Deciding which exam to take may seem overwhelming, but there are a few strategies you can follow to select the exam that best suits you and your professional goals. To begin the comparison, simply look at NCEES' exam specifications for both exams:
PE Civil Exam Breadth Topics Project Planning
  1. Means and Methods
  2. Soil Mechanics
  3. Structural Mechanics
  4. Hydraulics and Hydrology
  5. Geometrics
  6. Materials
  7. Site Development
PE Civil Exam Depth Topics
  1. Analysis and Design
  2. Hydraulics- Closed Circuits
  3. Hydraulics- Open Channel
  4. Hydrology
  5. Groundwater and Wells
  6. Wastewater Collection and Treatment
  7. Water Quality
  8. Drinking Water Distribution and Treatment
  9. Engineering Economics Analysis
PE Environmental Exam Topics
  1. Water
  2. Air
  3. Solid and Hazardous Waste
  4. Site Assessment and Remediation
  5. Environmental Health and Safety
  6. Associated Engineering Principles
When evaluating each exam's specifications, you will notice that there are many more topics on the PE Civil: Water Resources and Environmental Exam and less on the PE Environmental exam. The PE Environmental exam is much broader in its topics, so if you are aiming to take the PE Environmental exam, make sure to look into each subtopic to get a better understanding of what the exam will present. The PE Civil exam has a number of subtopics under each topic, as well. A good strategy is to pick the exam that has the most topics that you are comfortable with. Of course, keep your career goals in mind when looking at the NCEES exam specifications.
Another thing to put into consideration when picking your exam is your state board's regulations. Some states may stamp your license with a general PE stamp, as others will specify which engineering discipline you are licensed under. Always make sure to contact your state board before signing up for a specific exam.

Friday, 21 September 2018

PE Environmental Engineers Make the World Cleaner with Solar Panels

Solar panels have increasingly become more powerful within the past decade as well as increasingly popular. One of the main reasons solar panels have become so popular is because of their environmental friendliness. By using solar panels, CO2 emissions and any other waste product emissions are significantly reduced, which contributes to a more stable environment.i 
Another reason solar panels have become so popular is because of their increased efficiency. "In 2012, solar cells could convert 15% of the energy hitting them from the sun into power. As of 2018, the efficiency of the most advanced solar cells is closer to 23%, while average solar cells for residential use are around 18.7% efficient," an article about solar power reported.ii Because of the increased efficiency, thanks to PE Environmental engineers, users of solar panels can save a significant amount of money on energy bills. We break down why in an infographic below:
PE Environmental Engineers Make the World Cleaner with Solar Panels
Interested in developing solar panels? Become a Professional Environmental engineer! To become a licensed environmental engineer, one must take and pass both the FE Environmental and PE Environmental exams. School of PE provides both FE and PE Environmental exam review courses to assist those who are interested in becoming licensed. 
Through years of experience preparing exam review courses and obtaining student feedback, School of PE has formulated and strategized what really makes the best review course, and we believe School of PE provides the right tools and expertise to help students pass their exams. 
If you are interested in pursuing a career in environmental engineering and want to prepare for the FE and PE Environmental exams, check out School of PE!
References 
i. Tsoutsos T, Frantzeskaki N, Gekas V. Environmental impacts from the solar energy technologies. Energy Policy 2005;33:289-96.
ii. Zientara, B. How much electricity does a solar panel produce? Retrieved from https://www.solarpowerrocks.com/ solar-basics/how-much electricity-does-a solar-panel-produce/
iii. NREL. Solar Maps. Retrieved from https://www.nrel.gov/gis/solar.html

Wednesday, 7 June 2017

Types and Sources of Air Pollution

Air pollution is defined as the presence of any particle or gas found in the air that is not part of the original composition. Air pollution is a change in the physical, chemical, and biological characteristics of the air surrounding us. The substances that cause air pollution are called air pollutants, and they may be in the form of a gas, liquid, or solid.
Types and Sources of Air Pollution
Air pollutants are transboundary in nature as they travel and affect areas far away from their point of origin. Air pollution causes adverse effects on humans and other living organisms. Our PE Environmental exam review course thoroughly reviews the types and sources of air pollution for those preparing for the PE Environmental exam.
Air Quality Index
Air quality index (AQI) indicates whether pollutant levels in the air may cause health concerns. AQI ranges from 0 to 500, with a higher number meaning a lower air quality.
The table below provides the AQI limits for human health.

Air Quality Index
Air Quality
Air Quality Index Range
Good
0-50
Moderate
51-100
Unhealthy for sensitive groups
101-150
Unhealthy
151-200
Very unhealthy - ALERT
201-500
The air quality index table is a useful reference for environmental engineers preparing to take the PE exam.
Types of Air Pollutants
Air pollutants may be natural, such as wildfires, or may be synthetic (manmade). Air pollutants are classified as primary pollutants and secondary pollutants. (i) Primary air pollutants are emitted directly into the atmosphere by the original source.
(ii) Secondary air pollutants are formed because of reactions between primary pollutants and other elements in the atmosphere, such as the ozone.
The common air pollutants are discussed below:
  1. Carbon Monoxide - Carbon monoxide is a colorless, odorless gas. Carbon monoxide can be present in car exhaust and smoke. Carbon monoxide deprives humans of their oxygen supply, which causes headaches, fatigue, impaired vision, and even death.
  2. Sulfur Dioxide - Sulfur dioxide is produced when coal and fuel oils are burned and is also present in power plant exhaust. Exposure to sulfur dioxide narrows the airways in the respiratory system, which causes wheezing and shortness of breath.
  3. Nitrogen Dioxide - Nitrogen dioxide is both a primary and secondary air pollutant. Nitrogen dioxide is created when nitrogen reacts with oxygen in the atmosphere. Nitrogen dioxide can cause respiratory infections and other respiratory problems.
  4. Particulate Matter - Particulate matter contains particles of different sizes that are released into the atmosphere from various sources, including fossil fuels, dust, smoke, and fog. Particulate matter can accumulate in the respiratory system, which can aggravate the heart and lungs and increase the risk of respiratory infections.
  5. Ground-Level Ozone - Ground-level ozone is formed from automobile, power, and chemical plant exhausts. Ground-level ozone irritates the respiratory system and causes asthma by reducing lung function.
  6. Smog - Smog is the combination of gases with water vapor and dust and forms when heat and sunlight react with gases, which is known as photochemical smog.

Wednesday, 17 May 2017

Wastewater Treatment Methods

1. Introduction
Water is an ideal solvent with a neutral pH value and is colorless, odorless, and tasteless in its purest form. Any physical or chemical change in water that affects the health of a living organism is known as water pollution. Water can become contaminated due to domestic, industrial, physical, chemical, and biological pollutants. 
Water pollution is a global problem affecting millions of lives.
  1. 1.8 billion people do not have access to clean water
  2. 70% of all industrial waste is dumped into bodies of water
  3. 2 million tons of sewage is disposed of into bodies of water each day throughout the world 
  4. 840,000 people die each year from water-related diseases
Wastewater Treatment Methods
2. Sources of Water Pollution
Water pollution comes in different forms and from different sources. 
  1. Point-source pollution: pollutants derived from a single-known source (pipe or sewer line)
  2. Nonpoint-source pollution: pollutants that come from many unknown sources (agricultural run-off)
  3. Trans-boundary pollution: pollutants that affect the environment hundreds of miles away from the source (nuclear incident)
Water pollution and the causes of water pollution are thoroughly reviewed in our PE Environmental exam review courses.
3. Wastewater Treatment 
The water used for industrial and domestic purposes is degraded with pollutants, and such water must be treated to remove pollutants before being released into bodies of water. The aim of wastewater treatment is to remove suspended solids, salts, nutrients, bacteria, and oxygen-demanding material. Wastewater treatment is a large industry that is worth $20 billion a year. Therefore, it is important to study wastewater treatment methods prior to taking the PE exam. 
4. Methods of Wastewater Treatment
Wastewater is treated by using different methods to remove pollutants before returning the water to the drinking supply.
Two methods of water treatment are employed based on the need: 
  1. Conventional method using sewage tanks
  2. Centralized wastewater treatment plants
Wastewater treatment involves three stages: 
  • Primary stage
  • Secondary stage 
  • Tertiary stage 
The three stages involved in wastewater treatment are explained in the following flow charts:
Raw Sewage

Wastewater Treatment
(i) Primary Treatment
Screening stage: Incoming raw sewage enters the treatment plant and passes through a series of screens to remove large, floating organic material.
Sedimentation stage: In the second stage, water enters the sedimentation tanks to remove sand, small stones, and grit. The particulate matter settles out to form a mud called sludge. In the next step, sludge is removed and transported to a digester. Primary treatment removes about 35% of biochemical oxygen demand (BOD) from the polluted water. 
(ii) Secondary Treatment
Secondary treatment is a biological process involving microorganisms. The wastewater is pumped into oxidation ponds where the microorganisms oxidize its organic matter, and then it is transferred from the primary sedimentation tank to the stabilization tank. The partly-treated water then enters the final sedimentation tank where the sludge settles. After the sludge is settled, it is transported to the digester.
(iii) Chlorination Stage
At this stage, the pH value of the water is near neutral. The BOD value of water is assessed, and the chlorination process is activated to kill harmful pathogens. After chlorination, water that is safe to use can be discharged. Secondary treatment removes about 90% of BOD. Secondary treatment does not remove all nutrients, heavy metals, solvents and pesticides. To be cautionary in regards to safety, water should be treated in an advanced stage that involves sophisticated methods and technology.
(iv) Tertiary Treatment
Tertiary treatment is a physicochemical process aimed to remove the turbidity of wastewater caused by nitrogen, phosphorus, dissolved organic matter, heavy metals, and pathogens. Tertiary treatment involves a chemical oxidation of wastewater using strong oxidizing agents, such as chlorine gas, perchlorate salts, ozone gas, and UV radiation. Tertiary treatment renders the water safe to be discharged back into the environment. 
Wastewater treatment topics are extensively discussed and emphasized in our PE exam review courses for both environmental engineers and water resources engineers.

Monday, 24 April 2017

Effects of Air Pollution on the Environment

Air pollution occurs when harmful gases, dust, or smoke enters the atmosphere and has a negative impact on plants, animals, and/or humans. Air pollution is the deadliest form of pollution, killing millions of people each year. The World Health Organization reports that more than 92% of the world's population lives where air pollution exceeds safe limits. Among all other pollutants, air pollution has proven to be a major concern throughout the world. Air pollution and its impact on the environment creates an increasing demand for environmental engineers with their PE license.
Effects of Air Pollution on the Environment
Air Pollution Hazards
Air pollution hazards are thoroughly discussed in our PE Environmental review courses. 
Acid Rain
Acid rain is formed when sulfur dioxide and nitrogen oxide in the atmosphere is mixed with rainwater as a weak sulfuric and nitric acid. Acid rain can damage crops, plants, and aquatic life and is even capable of damaging structures. 
Eutrophication
Eutrophication is a condition created by using excessive fertilizers and pesticides that drain into bodies of water. Nutrients, such as nitrogen, stimulate blooms of algae, which in turn endangers aquatic life.
Haze
Haze is formed when sunlight encounters suspended pollutant particles in the air. Haze obstructs our vision, clarity, color, texture, and form of what we visualize in the real world. 
Negative Effects on Wildlife
Like humans, wild animals are also developing health problems as they are exposed to toxic air. Air toxins contribute to birth defects, reproductive failure, and disease in wild animals and aquatic ecosystems.
Ozone Depletion
Ozone is a gas that is present in the earth's upper atmosphere, the stratosphere. Ozone forms a layer that protects life on Earth from the sun's harmful ultraviolet (UV) rays. Ozone is gradually being destroyed due to ozone-depleting substances being released into the atmosphere. The thinning of the protective ozone layer is causing higher amounts of UV radiation to reach the earth, leading to more cases of skin cancer, cataracts, and impaired immune systems. UV rays also damage crops and lead to reduced yields.
Crop and Forest Damage
Air pollution damages crops and trees in many ways. Air pollution reduces growth and the survivability of plant seedlings and increases plant susceptibility to disease, pests, and other environmental stresses, such as harsh weather. 
Global Climate Change
The earth's atmosphere is a delicate balance of naturally occurring gases that trap excessive heat from the sun. This greenhouse effect protects and maintains a stable temperature on the planet. Throughout time, humans have disturbed this natural balance by producing greenhouse gases, including carbon dioxide and methane. Thus, the earth's atmosphere is trapping more of the sun's heat, leading to the average temperature to rise. This phenomenon is known as "global warming." Global warming has significant impacts on human health, agriculture, water resources, forests, wildlife, and coastal areas. 
Air pollution and its potential impacts on the environment are fully reviewed in our PE Environmental refresher course.