Showing posts with label California Civil. Show all posts

Thursday, 18 March 2021

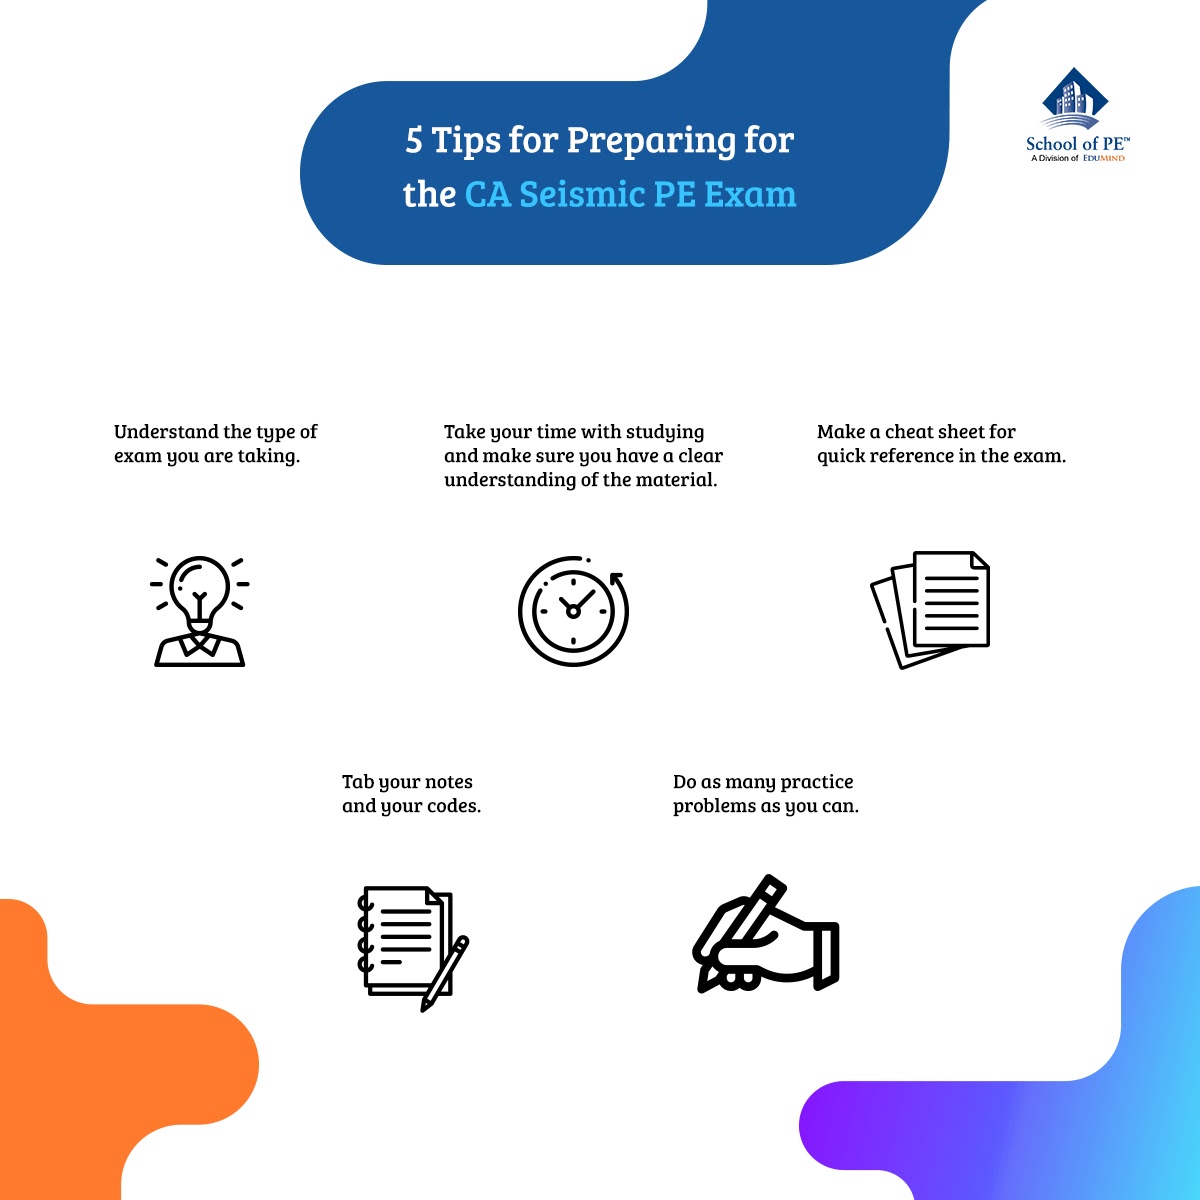
5 Tips for Preparing for the CA Seismic PE Exam

1. Understand the type of exam you are taking.
I say this all the time when people ask me about the exam - it is not the same type of exam as the national P.E. exam. It is not long. It is not slow. You do not really have time to look things up in your review book. Finally, it is much more problem and calculation oriented than definition oriented.
When I took the national exam (which, to be clear, I am not saying is easy), I remember feeling like the biggest thing I needed to know was where to look for the answers. From there, assuming a basic understanding, I would have time to read a paragraph or two to gain some specific knowledge and then answer the question.
This is not the way the seismic exam works. You won't have time to gain any knowledge during the exam -- You just have time to identify the proper equation, write it down, and plug it in to your calculator.
2. Take your time with studying and make sure you have a clear understanding of the material.
Unless you are already working in seismic engineering, this may be the first time you're really learning about seismic loading. It is completely different than gravity loading, so make sure you take the time to truly understand it. As I said above, you won't have time to learn new things during the exam, so don't set yourself up for that expectation.
5 Tips for Preparing for the CA Seismic PE Exam
3. Make a cheat sheet for quick reference in the exam.
When I was studying, I realized I was using a lot of equations equal to "F". Diaphragm forces, story shear, wall anchorage forces, base shear - the list goes on. One of the most valuable things I took into the exam was a list of all of those equations in one place, so I could easily reference them.
I would strongly urge you to pull together a cheat sheet with definitions and key equations. If you don't have the time or aren't sure what to include, you can one pre-made online. They actually sell some that will fit in to a binder, so that it can be considered "bound" per the board rules. I borrowed one of these from a co-worker for the exam and used it countless times.
4. Tab your notes and your codes.
This is my number one tip for all open-note exams, especially this one due to the speed of the exam. You can save a lot of time by having organized notes and tabs.
5. Do as many practice problems as you can.
This tip is last on this list, but it does not mean it's the least important! Doing as many problems as you can is key to discovering "tricks" and common errors, as well as being able to quickly identify which equations and parameters to use.

Thursday, 11 March 2021

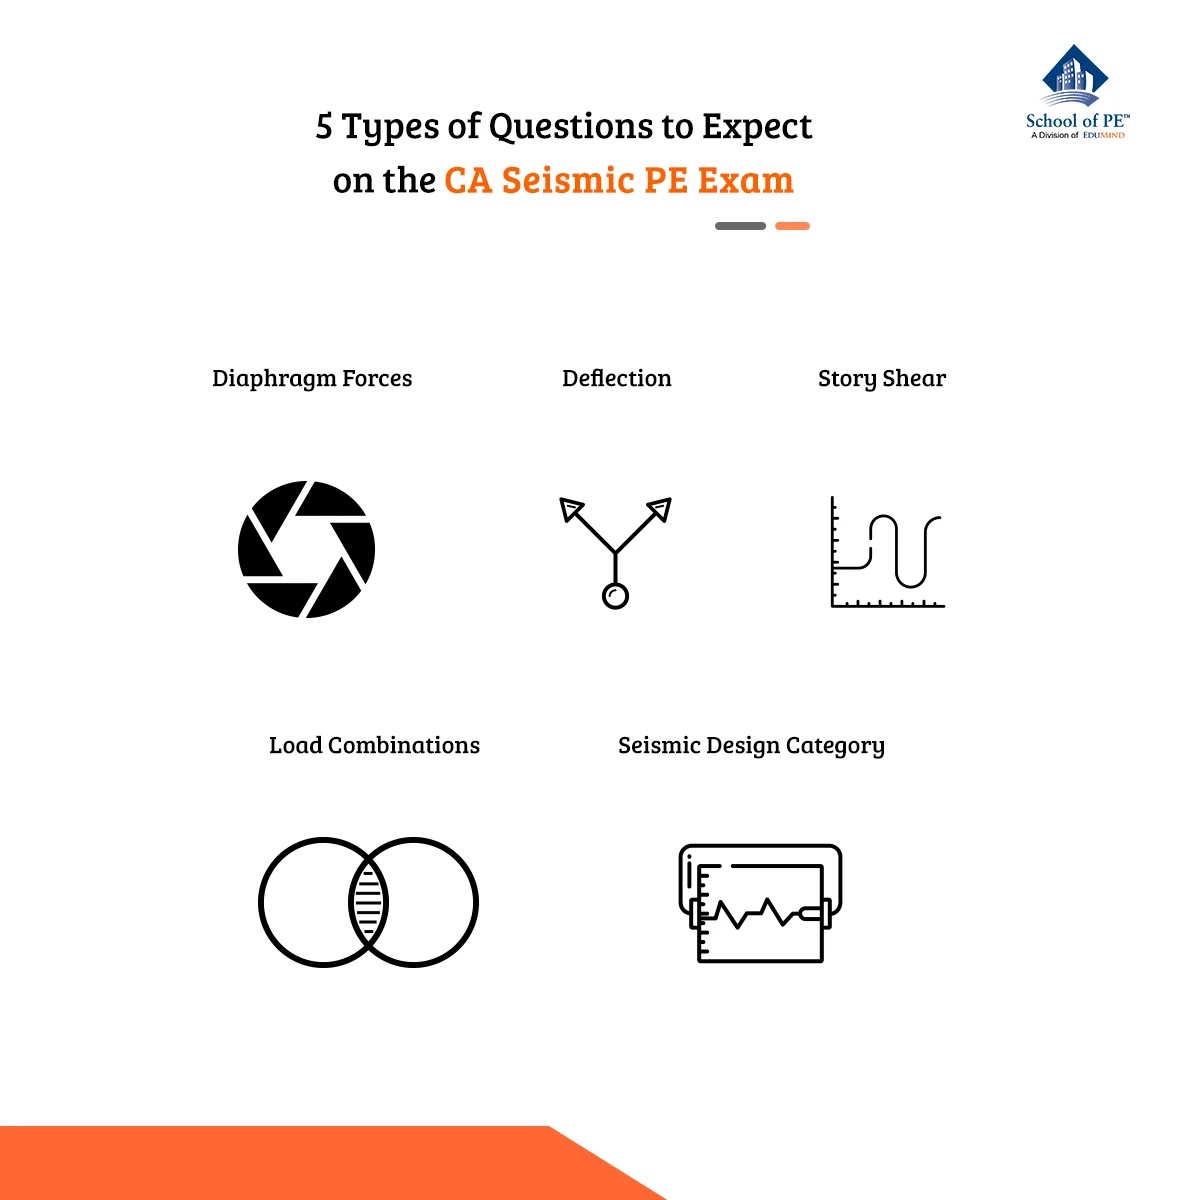
5 Types of Questions to Expect on the CA Seismic PE Exam

While the Board of Professional Engineers, Land Surveyors, and Geologists provides a list of six primary content areas, I thought it would be helpful to talk specifically what types of calculation-based questions you can expect to see on the exam.
Keep in mind that I am not in any way associated with the writing of the exam, and my opinions are solely based on my experiences with preparing for and taking the exam.
1. Diaphragm Forces
Diaphragm forces make up a huge part of the exam (at least in my experience). When I was preparing for the exam, I remember a coworker telling me to be sure I was comfortable with all diaphragm calcs, and I have to say I really appreciated getting that advice!
Diaphragm force calculations can come in many forms - the actual force calculations for both one-story and multi-story buildings, as well as chord and collector calculations. From a definition standpoint, be sure you know the differences between flexible and rigid diaphragms and the calculations that go along with that.
2. Deflection
Deflection is a big one, as it ties so many pieces together. There are a few key words you'll need to look out for on this topic.
First, drift vs. deflection. Reread the problem and make sure you're answering the right one!
Secondly, elastic vs. inelastic story drift. This can make a huge difference to your answer, so again, make sure you're reading the problems closely.
Beyond those basic definitions, be prepared for questions on the P-Δ effect, the stability coefficient, and separation (on the same property vs. two separate properties!)
Deflection problems may seem basic at first glance - and you're right, the calculations are basic- but it sure is easy to misread the problem when you're in a rush and accidentally answer the wrong question.
5 Types of Questions to Expect on the CA Seismic PE Exam
3. Story Shear
"Story Shear" is one way of saying, make sure you're comfortable with the vertical distribution of forces method and the Equivalent Lateral Force Procedure. This is definitely one of the most quintessential Seismic P.E. question styles, so practice these! Once you get the hang of it, these are easy problems to get right during the exam.
4. Load Combinations
Seismic load combinations are one of those things that will trip you up if you've only been working with gravity load combinations in the past. There are a lot of small rules such as only count snow load if the flat roof snow load exceeds 30 psf, regardless of the slope of the roof, and then only include 20% of the snow load. There are rules for live load, partitions, and equipment loading too, and it's important to make sure you're comfortable with them. These can be easy points to get on the exam if you're prepared!
5. Seismic Design Category
While the exam may not come out right and ask what seismic design category a given building should be classified as, I am certain that the calculations that lead to this conclusion will be instrumental throughout the exam. These are a basic test of your knowledge of the importance factors, tables in ASCE 7-16 Section 11.4, and site class definitions. There are lots of factors here that need to be multiplied together in various ways. These values would be a great addition to a cheat sheet!
I hope these can help you focus your study efforts, or to act as a final checklist in your week-before-the-exam-self check-in. If you're comfortable and confident with each of these problem types, I think you'll do well on the exam.

Monday, 19 October 2020

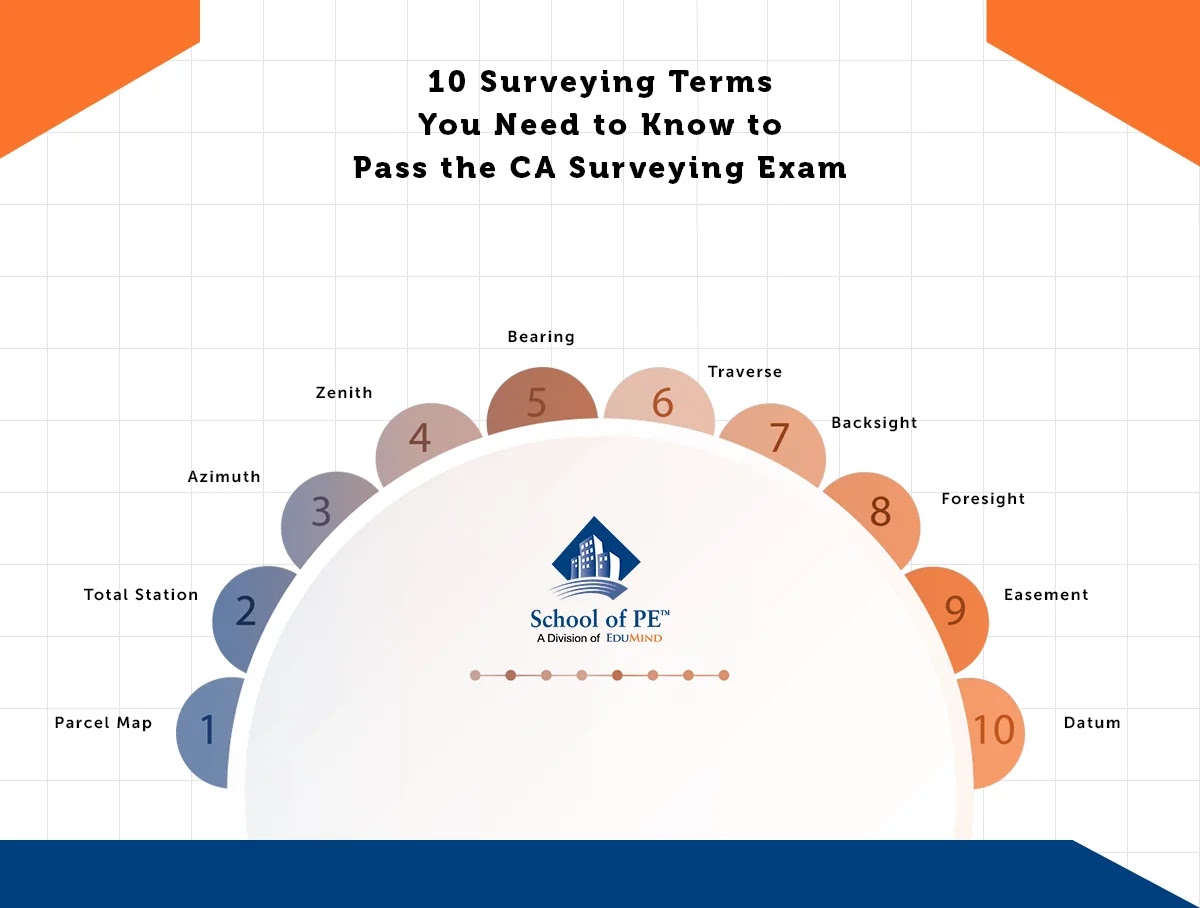
10 Surveying Terms You Need to Know to Pass the CA Surveying Exam

Terms and definitions make up a HUGE part of the material on the exam. My #1 test strategy (OK, maybe #2 after getting a graphing calculator) is to bring a surveying dictionary into the exam. While there are so many terms to know, here are 10 you should memorize: 
1. Parcel Map 
A parcel map is a map that divides a large parcel into four or fewer parcels. Conversely, a subdivision map is a map that divides a large parcel into five or more parcels. 
2. Total Station 
A total station is the current industry standard for surveying equipment. It's classified as an electronic distancing measure (EDM), and it can also measure vertical and horizontal angles and record data. It typically requires two people to operate it, but there is a "robotic" total station that only needs one surveyor. 
3. Azimuth 
An azimuth measures horizontal angles (in 2D) from 0 to 360 degrees in a clockwise motion. 
4. Zenith 
A zenith measures vertical angles from 0 to 360 degrees in a clockwise motion, starting from the 12 o'clock position. 
5. Bearing 
A bearing measures angles, but only from 0 to 90 degrees. It is always relative to the north or south axis and is written in the form of N (or S) X Y' Z" E (or W). A back bearing (of a given bearing) is the opposite: S (or N) X Y' Z'' W (or E). 
6. Traverse 
A traverse is a plan view of the path a surveyor takes. If it starts and ends at the same point, it is considered as a closed traverse. Otherwise, it is an open traverse
10 Surveying Terms You Need to Know to Pass the CA Surveying Exam
7. Backsight 
The backsight is the vertical distance measurement from the benchmark to a known elevation during differential leveling. 
8. Foresight 
The foresight is the vertical distance measurement from the benchmark to an unknown location during differential leveling. 
Terms 7 & 8 are related in the following equations: Elevation1 + Backsight - Foresight = Elevation2 
9. Easement 
An easement is technically defined as shared land determined by a legal document, which allows a non-property owner to use the property. You'll see this a lot with utilities. The easement must outline the following: purpose, who the easement is between, the width, the duration, and the location based on a rectangular coordinate system. 
10. Datum 
There are two national datums, which establish horizontal and vertical coordinates. NAD 83 (which was updated from NAD 27) governs horizontal datums. NAVD 88 (which was updated from NGVD 29) governs vertical datums
School of PE offers comprehensive exam review courses for the CA Seismic and CA Surveying exams. Visit our website to register for a prep class that best fits your schedule.

Monday, 21 September 2020

10 Strategies to Pass the California Surveying Exam the First Time

1. Use a graphing calculator 
You can use a graphing calculator on this exam, and you're going to want to. This will make the conversion of Degrees Minutes Seconds to Degrees so easy! 
2. Get a clear, flexible ruler 
A lot of the diagrams on the exam will be to scale, and guess what? That means you can literally measure the screen and multiply to get your answer! Forget the distance formula on these and save some crucial time. 
3. Take a surveying dictionary into the exam 
Definitions are huge on this test, and there are more terms than you can possibly take notes on in a review course. A surveying dictionary is the best way to ensure you have all the knowledge you could possibly need on this exam. 
4. Make a cheat sheet 
Making a cheat sheet is the best way to have all the info you need for calculations in one place. This should include the formulas for curves, formulas for differential leveling, unit conversions, and area formulas (at least)! Just make sure it's "bound" in a notebook or binder so you can take it into the exam room, loose paper is not allowed. 
5. Do as many practice problems as you can
Practice makes perfect, and you'll want to do a lot of practice problems for this exam. There may not be too many topics, but the topics can be tested in many ways, so be sure you're prepared. 
10 Strategies to Pass the California Surveying Exam the First Time
6. Focus on the important topics 
In my opinion, the best way to do this is to take a review course or do some online research before you start studying. There are a lot of topics (looking at you, photogrammetry!) that you need to be familiar with but shouldn't spend a week on intensive studying. I found it hard on this exam, in particular, to know what was important and what wasn't, so a prep course would be a good idea. 
7. Know how to recognize "errors" 
Error questions are common on the exam. There can be errors in so much of surveying and you need to be able to apply a "correction factor," know how to "close the transverse," or calculate the "ratio of error." Make sure you don't skip the error sections when you're studying. 
8. Be comfortable with sign conventions 
These can be so tricky on the exam, especially if you're stressed and pressed for time. Knowing your positives and negatives for cut/fill problems, magnetic declination, or even taping corrections will be really important for getting those problems right. 
9. Watch your units! 
Beyond the obvious conversions, one super common "trick" is to give you a scale in length and ask for a scaled area. You need to apply the scale factor twice for the change from distance to area. 
10. Be invested 
I know this test isn't very popular among many engineers. It differs from the bulk of what we learned in undergrad and do in our professional lives, but if you can get excited about learning something new and leaning in to the material in whichever way suits you, this process will be a lot more enjoyable and effective!
School of PE offers comprehensive exam review courses for the CA Seismic and CA Surveying exams. Visit our website to register for a prep class that best fits your schedule.
About the Author: Erin E. Kelly

Ms. Kelly is an experienced structural engineer with a focus on seismic risk. She has extensive experience in structural failure investigations, seismic structural design, and seismic risk assessments. Through the School of P.E., she has taught a 32-hour course for the California Seismic P.E. Exam, authored several blog posts, and contributed to other review products. She has a Bachelor of Science in Civil Engineering from Johns Hopkins University and a Masters of Engineering in Structural Engineering from Lehigh University.

Monday, 31 August 2020

10 California Engineering Surveying Studying Tips


1. Buy a graphing calculator 
A graphing calculator will save you so much time on the California Surveying Exam (CSE) in converting from Degrees Minutes Seconds to a decimal form of Degrees. The calculator requirements for this exam are different than others, so be sure to check them and invest wisely! 
2. Focus on the curves 
Vertical- and horizontal-curve questions are the most important thing to study. They come up often on the exam and can be tricky. Being able to identify locations in the problem statement/diagram as terms in the curve equations will be key to your success. 
3. Don't underestimate the difficulty of "scale" questions 
"Scaling" may seem like an easy concept, but trust me, it can be harder than it seems in the pressure of an exam. There are several ways this can go: a scale given in length, and the exam asking about an area; two scales being compared and needing to know which is "larger"; needing to know what scale to use based on a given a distance and the size of a paper; or asking for a real distance given the measured distance and scale factor. Be sure to have experience with each of these! 
4. Memorize conversions 
I don't think I'll ever forget the conversion from 1 square foot to 1 acre: 43560! Memorize some key conversions like this to save time on the exam. Also, have them written somewhere in case the exam stress makes you want to triple check! 
5. Obtain a "surveying" dictionary 
I really think this was a lifesaver for me on the exam when there were definition questions-and trust me there will be! With different types of maps, surveying techniques, equipment, etc., the dictionary is your friend on this exam. 
6. Do as many practice problems as you can get your hands on 
I can't say this enough, but for this exam, in particular, practice, practice, practice! 
7. Don't get overwhelmed by big words like "photogrammetry" 
The CSE really focuses on basic surveying techniques, geometry, and conversions. Your time is better spent doing practice problems, getting familiar with terms and equations, and memorizing definitions than getting swept up in fancy technology. Know about it, but don't dwell on it. 
8. Zeniths and Bearings will be in (almost) every question-make sure you know the difference and are comfortable with them 
Zeniths and Bearings are a fancy way of stating the slope of a line. If you think this exam is about anything other than determining the angles and distances of objects and curves, you're mistaken. Be able to identify these problems, be comfortable with them, and you'll go far with this exam.
9. Have area formulas handy 
These can be a pain to memorize (and honestly probably too much to hold in your brain) while also memorizing terms and formulas. Still, you should have area formulas handy to quickly skim and determine the best formula to use. 
10. Get into it! 
A LOT of engineers seem to think this is the "least interesting" exam or wonder why certain types of civil engineers need to take it. Trust me, this whole studying and exam-taking process will be a lot easier and more enjoyable if you get rid of that little voice in your head and find this stuff interesting!
About the Author: Erin E. Kelly

Ms. Kelly is an experienced structural engineer with a focus on seismic risk. She has extensive experience in structural failure investigations, seismic structural design, and seismic risk assessments. Through the School of P.E., she has taught a 32-hour course for the California Seismic P.E. Exam, authored several blog posts, and contributed to other review products. She has a Bachelor of Science in Civil Engineering from Johns Hopkins University and a Masters of Engineering in Structural Engineering from Lehigh University.

Monday, 24 August 2020

Does Passing the CA Surveying Exam Make You a Licensed Surveyor?

The short answer is no. Despite passing a licensing exam commonly referred to as the "surveying exam," you are only taking this exam to complete civil engineering licensure, not a surveying licensure. 
This applies to the current day, but it's good to know that civil engineers registered before January 1, 1982 are, for all intents and purposes, considered licensed surveyors. 
So, what can you do? You can: 
  1. Create and use topographic maps
  2. Set construction stakes after control points are established
  3. Create contour surveys using photogrammetry
  4. Become a city engineer
  5. Create a tentative map (a preliminary subdivision or parcel map)
  6. Prepare civil plans
  7. Use ALTA (American Land Title Surveys) to create grading plans
What can you not do? You cannot: 
  1. Set and relocate monuments or control points
  2. Re-establish benchmark elevations
  3. Replace lost corners
  4. Prepare legal descriptions
  5. Prepare parcel or subdivision maps
  6. Prepare boundary/property surveys
  7. Perform boundary line adjustments
  8. Perform geodetic surveying
  9. Replace lost corners
  10. Establish easements
  11. Create right-of-way maps
These "cans" and "cannots" are outlined in several acts, the two most predominant being the Subdivision Map Act and the Civil Engineers Act. For the Civil Engineers Act, Article 3 outlines the "authority to offer to practice or procure land surveying." This is the most important section of the Act when it comes to what you can and cannot do. 
Because of all of these restrictions, it is frequently questioned by many civil engineers why this test is required or worthwhile. My answer is that you, as a civil engineer, need to be able to interpret surveying documents that are presented to you. In design structural engineering, in particular, you'll be presented with documents from several disciplines (civil, landscaping, architectural, electrical, mechanical, etc.) and each of those documents will influence your design. If you misinterpret surveying information on the civil grading plans, for example, your design may not have factored in some critical loading information. 
While passing this exam doesn't grant you all the rights of a licensed surveyor, it is important for us to recognize the role that we play, and the importance of competency on the subject. 
School of PE offers comprehensive exam review courses for the CA Seismic and CA Surveying exams. Visit our website to register for a prep class that best fits your schedule.
About the Author: Erin E. Kelly

Ms. Kelly is an experienced structural engineer with a focus on seismic risk. She has extensive experience in structural failure investigations, seismic structural design, and seismic risk assessments. Through the School of P.E., she has taught a 32-hour course for the California Seismic P.E. Exam, authored several blog posts, and contributed to other review products. She has a Bachelor of Science in Civil Engineering from Johns Hopkins University and a Masters of Engineering in Structural Engineering from Lehigh University.

Monday, 17 August 2020

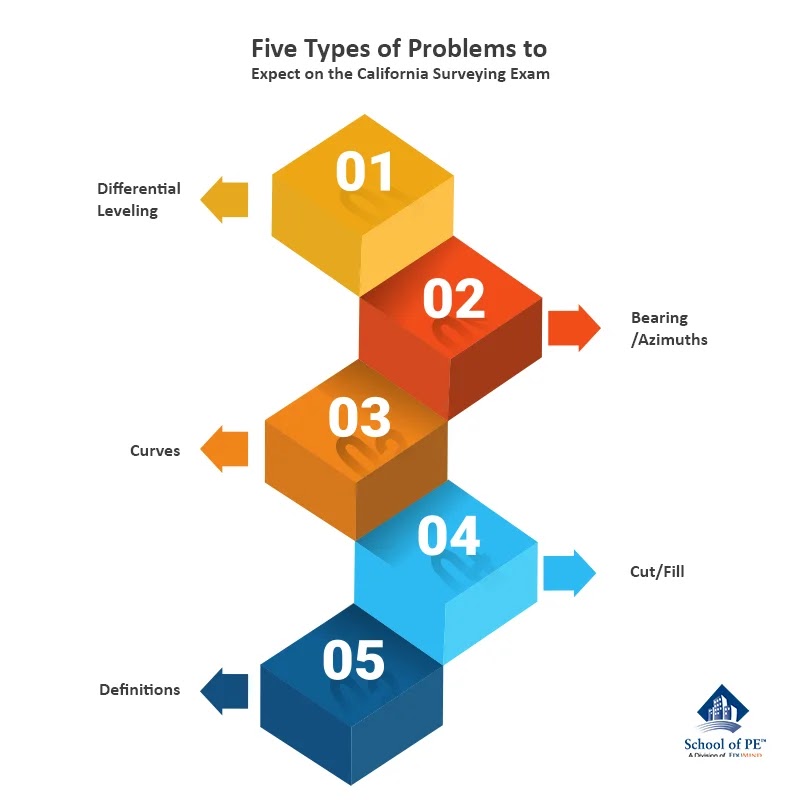
Five Types of Problems to Expect on the California Surveying Exam

1. Differential Leveling 
Differential leveling problems are big on the exam, but luckily really come down to two main formulas, with very few variables. Make sure you know the definitions of backsight and foresight and these will be a breeze. 
Related: Stadia problems are similar but involve the inclined equipment and a lot more geometry when sorting out the angles. 
2. Bearings/Azimuths 
A bearing is a measurement of an angle within a quadrant, relative to the north and south axes. An azimuth is a measurement of an angle relative to the north axis (up to 360 degrees). These two terms are guaranteed to come up on the exam, either as standalone questions or part of a larger problem. 
Related: Make sure you have a graphing calculator to help convert Degrees Minutes Seconds to Degrees! 
3. Curves 
Horizontal and vertical curves are, from my experience, the largest topic on the exam. The best thing you can do for yourself is to practice these questions until you feel absolutely confident. It will also help to either tab your notes or make a cheat sheet with all the useful formulas. 
Five Types of Problems to Expect on the California Surveying Exam
4. Cut/Fill 
Cut and fill questions were, honestly, the hardest for me. While it may seem simple, these problems combine several concepts, sign conventions (+/-), area formulas, reading charts, and knowing many definitions. 
Related: Along with cut and fill diagrams, don't forget to study up on mass diagrams, borrow pits, and shrinkage vs. swell. 
5. Definitions 
Definitions will make up a major portion of the exam, and my #1 tip is to take a surveying dictionary with you into the exam. This will help with all the terms and make you feel confident in your answers. The definitions will often be focused on types of maps, surveying techniques, or equipment. 
School of PE offers comprehensive exam review courses for the CA Seismic and CA Surveying exams. Visit our website to register for a prep class that best fits your schedule.
About the Author: Erin E. Kelly

Ms. Kelly is an experienced structural engineer with a focus on seismic risk. She has extensive experience in structural failure investigations, seismic structural design, and seismic risk assessments. Through the School of P.E., she has taught a 32-hour course for the California Seismic P.E. Exam, authored several blog posts, and contributed to other review products. She has a Bachelor of Science in Civil Engineering from Johns Hopkins University and a Masters of Engineering in Structural Engineering from Lehigh University.

Sunday, 9 August 2020

Errors in Surveying: How to Identify and Calculate for the CA Surveying Exam

The data mapped in surveying can be used for many purposes, from defining boundaries in legal documents to determining the best route to run utilities or construct a road. With all of these implications, accuracy in surveying is so important. However, given the varying terrains and conditions for it, it's no surprise that accuracy can be hard to ensure in the field. 
The two main styles of surveying covered on this exam are stationing with tapes and using a total station to create a traverse. In this blog post, we'll cover errors for both methods. 
1. Stationing Errors
When stationing with a tape, each tape will be standardized to a certain temperature, tension, and length. You'll learn the correction formulas in the course, but here are some rules of thumb to remember: 
For temperature, if the temperature is higher than the standard, the measured distance will be shorter than the actual distance. If not otherwise noted, the standard temperature is usually 68 degrees Fahrenheit. 
For tension, if the tension is higher than the standard tension, the measured distance will be shorter than the actual distance. 
For length, if the tape is found to be longer than the nominal length, the measured distance will be shorter than the actual distance. If not otherwise noted, the standard length is 100 feet. 
There are two other corrections that you should also be aware of, and those are for sag correction (also related to tension) and elevation correction if the measurements are being taken at a high altitude. 
2. Closed Traverse Errors
When conducting a survey using a total station, the path that the surveyor travels is called a traverse. A closed traverse is when the surveyor starts and ends in the same place. If the surveyor intends to do this, but the start and end points are slightly different, you have an error that must be accommodated for. This is called a misclosure error
To adjust for this, consider the X and Y components of the misclosure error, and then apply those proportionally to each leg. So, if one leg is 50% of the total traverse, you would apply half the error in X and half the error in Y to the end point of that leg. Note that X and Y are handled separately for this. 
In addition to linear misclosure, angular misclosure must be considered as well. The sum of interior angles of a closed traverse should be 180 degrees * (n-2), where n equals the number of nodes or sides. The sum of the exterior angle should be 180 degrees * (n+2). If the sum of the measured angles (interior or exterior) does not match the result of these equations, the angles will need to be adjusted. One thing to note is that all angles are considered equally, so the misclosure adjustment is divided evenly to each angle, and not applied proportionally like the length adjustments are. 
School of PE offers comprehensive exam review courses for the CA Seismic and CA Surveying exams. Visit our website to register for a prep class that best fits your schedule.
About the Author: Erin E. Kelly

Ms. Kelly is an experienced structural engineer with a focus on seismic risk. She has extensive experience in structural failure investigations, seismic structural design, and seismic risk assessments. Through the School of P.E., she has taught a 32-hour course for the California Seismic P.E. Exam, authored several blog posts, and contributed to other review products. She has a Bachelor of Science in Civil Engineering from Johns Hopkins University and a Masters of Engineering in Structural Engineering from Lehigh University.

Monday, 3 August 2020

Four Strategies for Tackling Scale Problems on the CA Surveying Exam

1. Know the difference between a large scale and a small scale 
I'll just state this upfront: 1/10 is a larger scale than 1/100. Write that down somewhere, so you never get confused again! The worst part of this exam for me was memorizing conventions like that. This will come up both directly and indirectly in questions. For example, maybe you've determined that the scale required to fit a map on a sheet of paper is 1/44 and the problem asks for the largest scale that can be used, rounded to the nearest 10. The answer would be 1/50, because 1/40 would be too large and 1/60 would be too small. 
2. Study the units in the problem statement and the solution 
A very common "trick" on the exam is to give you a linear scale (so 1:10), and then ask for the measurement of a rectangular area. You'll have to apply the scale factor twice because the units considered are changing from linear to square. For example, if the rectangle is 2" x 3" on the paper, the area isn't just 6 square inches *10 (=60), it's 2*10 x 3*10 = 600. This can definitely get you if you're moving too quickly on the exam, so look out for these. 
3. Notice when units are missing
As in the example above, the scale is given as 1:10. When the units are not given in a scale, you can assume that the units are the same. For example, 1 inch = 10 inches, 1 mile = 10 miles. Sometimes the problem statement can be written in a misleading way, so make sure to recognize when the units are missing. 
Strategies for Tackling Scale Problems on CA Surveying Exam
4. Know what "scale factor" means
You'll sometimes see a problem state, "the scale factor is x" and the measured distance is y, what is the real distance? For me, it can be tricky to remember if you're supposed to multiply or divide by the scale factor, so jot down this formula on your cheat sheet: real distance = measured distance *x 
School of PE offers comprehensive exam review courses for the CA Seismic and CA Surveying exams. Visit our website to register for a prep class that best fits your schedule. 
About the Author: Erin E. Kelly

Ms. Kelly is an experienced structural engineer with a focus on seismic risk. She has extensive experience in structural failure investigations, seismic structural design, and seismic risk assessments. Through the School of P.E., she has taught a 32-hour course for the California Seismic P.E. Exam, authored several blog posts, and contributed to other review products. She has a Bachelor of Science in Civil Engineering from Johns Hopkins University and a Masters of Engineering in Structural Engineering from Lehigh University.

Monday, 27 July 2020

The Five Best Ways to Prepare for the CA Surveying Exam

1. Take a course 
While preparing to take the California Surveying Exam (CSE), I found that there isn't one specific book that you can use as an exam review manual. Instead, my coworkers at the time presented me with five different textbooks I could use, with no real guidance or certainty on which one would be best. Beyond that, those texts were meant to go way deeper than the exam on many topics. Taking a course, in my opinion, is the best way to identify what is important on the exam and not waste time on topics that won't be tested.
2. Get familiar with your graphing calculator 
The calculator permissions on this exam are different than others, and that means you can use a graphing calculator here. That is great news because you'll frequently be asked to convert Degrees Minutes Seconds to Degrees (in decimal form), either as the whole problem or a part of the problem. Sure, you could do it by hand, but you really won't have time for that! These calculators can be expensive but it's a worthy investment! (Tip: Ask a friend, classmate, or coworker to borrow theirs if you don't have one). 
3. Create an easy reference guide 
Whether you make a cheat sheet or tab formulas in your notebook, it's really important to have conversions (how many square feet are in an acre?) and formulas (area and curve) easily accessible to get through this exam. 
4. Practice, practice, practice 
I can't say this enough-practicing is so important. They can frame the question so many different ways, so you need to be really familiar with the information. Once you are well-versed in the material, it should be easy to identify what is being asked and how to plug it into the formulas you have. 
The Five Best Ways to Prepare for the CA Surveying Exam
5. Become invested
One of the best "study strategies" I've found is to become really invested in the material. Change your attitude and try to find the content fascinating. At the time that I was preparing for this exam, I was doing design engineering work. I would look at some of my supporting material and get excited to see the bearings and easements and all the fun stuff you'll learn while preparing for the test. It not only makes the prep time more bearable, but it also will help the information stick!
About the Author: Erin E. Kelly

Ms. Kelly is an experienced structural engineer with a focus on seismic risk. She has extensive experience in structural failure investigations, seismic structural design, and seismic risk assessments. Through the School of P.E., she has taught a 32-hour course for the California Seismic P.E. Exam, authored several blog posts, and contributed to other review products. She has a Bachelor of Science in Civil Engineering from Johns Hopkins University and a Masters of Engineering in Structural Engineering from Lehigh University.

Monday, 20 July 2020

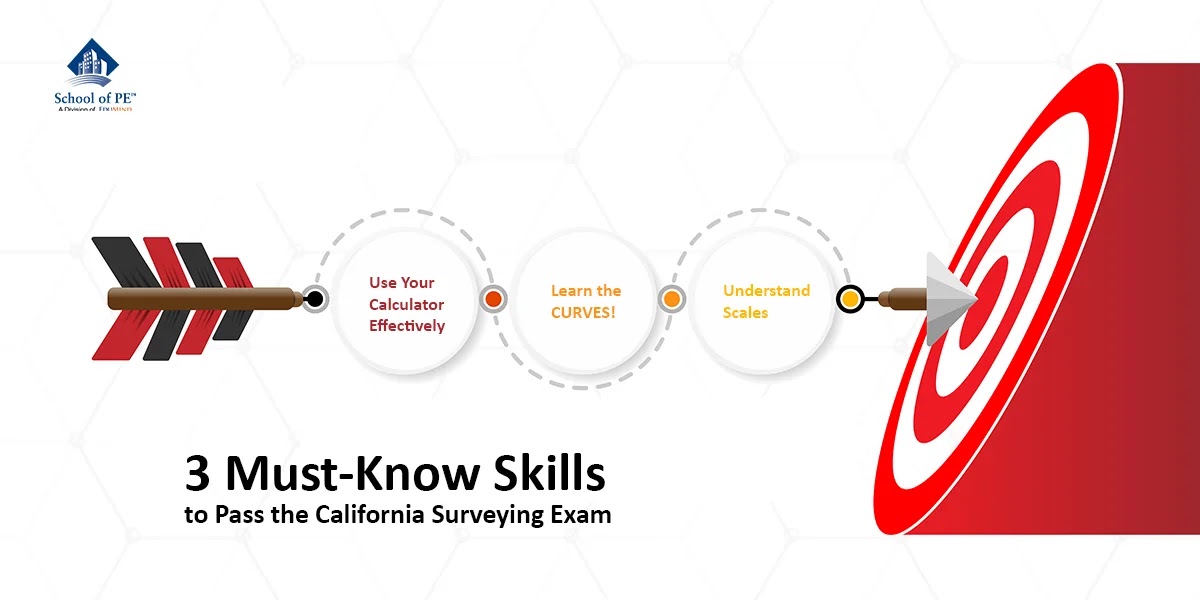
Three Must-Know Skills to Pass the California Surveying Exam

1. How to MOST Effectively Use Your Calculator 
This may not be the first thing that comes to mind when you think of "skills" needed to pass the California Surveying Exam (CSE), but trust me, using a graphing calculator is going to be absolutely crucial to your success. This is because the CSE is a test of not only knowledge but speed as well. You need to know the material well enough to recall it quickly, and you also need to have the calculator skills to avoid spending too much time on computation. The main thing the graphing calculator will help you with is converting from Degrees Minutes Seconds to a decimal form of degrees, so that you can plug that single value into the equations you'll be using. A normal calculator won't be able to help you do the conversion as quickly. Check the latest requirements on calculators to make sure your calculator is permitted and note that the requirements for this exam differ from other PE exams. 
2. CURVES! 
I've heard that horizontal and vertical curves can make up about 40-50% of the questions on the exam. Those values are empirical but, from my experience, I would say it's close. These concepts are very important to surveying, so get comfortable with them. Internalize the formulas, know how to recognize them, know all the tricks, and practice, practice, practice. I tend to tab my notes and books for these exams, and I tabbed the pages for vertical and horizontal curves in a different color than everything else so that I could find them quickly during the exam. 
Three Must-Know Skills to Pass the California Surveying Exam
3. Understand Scales
Scale factors may seem like a straightforward concept, but they are a really easy way to gain or lose points on the exam. There are a lot of ways that the issue of scale can come up. I'll list some examples here: 
 If you want to show X feet of distance on a Y" sheet of paper, what scale should be used? 
 Which scale is larger 1" = 1 mile or 1/1000? 
 If the Scale Factor is X, and the measured distance is Y, what is the real distance? 
 The scale is 1:10, and what is the real area of a measured rectangle with side lengths of X and Y? 
There's a lot packed into these four questions, and you should be familiar with each of these concepts. I would recommend practicing questions regarding scale and checking your answers after. You may be surprised by how often you get tripped up by not considering units, not considering length scales vs. area questions, or deciding between a "large" and "small" scale. It's worth spending time on this topic to make sure you never make a silly mistake.
About the Author: Erin E. Kelly

Ms. Kelly is an experienced structural engineer with a focus on seismic risk. She has extensive experience in structural failure investigations, seismic structural design, and seismic risk assessments. Through the School of P.E., she has taught a 32-hour course for the California Seismic P.E. Exam, authored several blog posts, and contributed to other review products. She has a Bachelor of Science in Civil Engineering from Johns Hopkins University and a Masters of Engineering in Structural Engineering from Lehigh University.

Monday, 13 July 2020

Everything You Need to Know About the CA Surveying Exam

The California Surveying Exam is part of the California Civil Professional Engineering License. Once you pass the national PE-the long, sometimes dreaded, 8-hour breadth exam-you can take both the CA Seismic and CA Surveying exams. Both of these are required in order to obtain your PE license in California. 
The CA Surveying exam is a 2.5-hour test with 55 questions, which gives you fewer than three minutes per question. If you remember from preparing for the breadth exam, you get six minutes per question on that one. So, get ready to increase your speed! 
The CA Surveying exam is computer based and offered most days of the year. You will receive an Authorization to Test (ATT) from the Board of Professional Engineers, Land Surveyors, and Geologists with your identification number, test name, and eligible dates which you will use to schedule your exam. 
From there, you're on your own to study and prepare for the exam. I've written a few other blog posts on this topic, but my main study tips are to focus on the important topics (you can determine this through online research or by taking a prep course); invest in a graphing calculator, and get comfortable with it; make a cheat sheet with useful conversions and formulas for easy reference; and do as many practice problems as possible! 
On test day, I advise you to get to the test center early, have all of your references bound (free sheets of paper are not allowed, so make sure to put your cheat sheet in a binder or notebook), and have a sweater with you in case the room is cold. The test center should provide earplugs, noise-canceling headphones, tissues, writing paper, and a writing utensil. Go into the test confident and focused, and it'll be over before you know it! 
I can't say with certainty, but I found that test results are released on the ninth or 10th of the month after you take the exam. For example, I took the Seismic exam on the sixth of the month and had to wait for what felt like a really long time to get my results. Then, I intentionally took the Surveying exam on the 25th of the month so I could minimize the wait time. 
I hope this helped you feel more comfortable with what to expect. This test is totally doable with good preparation. Best of luck! 
School of PE offers comprehensive exam review courses for the CA Seismic and CA Surveying exams. Visit our website to register for a prep class that best fits your schedule.
About the Author: Erin E. Kelly

Ms. Kelly is an experienced structural engineer with a focus on seismic risk. She has extensive experience in structural failure investigations, seismic structural design, and seismic risk assessments. Through the School of P.E., she has taught a 32-hour course for the California Seismic P.E. Exam, authored several blog posts, and contributed to other review products. She has a Bachelor of Science in Civil Engineering from Johns Hopkins University and a Masters of Engineering in Structural Engineering from Lehigh University.

Monday, 6 July 2020

What is ductility and why is it important for earthquake resistant structure?

I've heard ductility referred to as the "secret sauce of seismic engineering," and I think that's truly the perfect way to describe it. But maybe you've heard this before and don't know why or how it is true? I hope this blog can shed some light on that for you. 
Ductility is technically defined as the "ability to withstand cyclic deformations," and as such is not directly related to flexibility or stiffness. Flexibility and stiffness are measurements of how far an element will deflect under a given force, whereas ductility is more about how the element will deflect, especially at yielding and beyond. In the simplest of terms, a ductile structure will bend and not break, which greatly reduces the risk of a catastrophic failure. 
As an example, consider an unreinforced masonry shear wall, which will crack and fail in a brittle manner during an earthquake, compared to a steel moment frame which, ideally, will sustain large deflections, deform elastically, and resist collapse during the seismic event. 
A book by Mario Salvadori titled Why Buildings Stand Up does a great job of illustrating the concept of ductility, so I'll borrow from him here. Salvadori writes of ductile materials, "materials that behave elastically under relatively small loads and plastically under higher loads do not reach their breaking point suddenly. Once they stop behaving elastically, they keep stretching (or shortening) under increasing loads until they continue to so even without an increase in loads. Only then they fail. If a steel wire is weighted heavily enough, it will keep stretching or yielding under a constant load. It thus gives warning of its impending failure." 
If you reread that last paragraph, while visualizing the stress-strain curve of steel, you can see the great impact of ductility and how it can increase the resiliency of our structures. Salvadori explains that by bending without breaking, ductile materials give a "warning" that they're going to fail, as opposed to brittle structures that fail with no warning and often in a catastrophic manner. This allows for the safe evacuation of occupants which is ultimately the goal of our structures in seismic regions. 
This, of course, causes me to reflect on the limit state to which we design our structures: life safety. There are technically four limit states, listed here with increasing damage: operational (no damage), immediate occupancy, life safety, and collapse prevention. By choosing "life safety" as the industry standard, we are agreeing to design to a standard in which damage can occur, but only to the extent in which occupants will be able to evacuate safely. If construction in seismic regions were done with more brittle materials, this standard would not be able to be achieved, as the failure would be sudden, with no warning. By using ductile materials, we are given warning, and can accept a lower limit state without worrying about a sudden, dangerous, and potentially deadly collapse. 
I hope that this has provided some insight into the importance of ductility outside of just the numbers and the code. The materials we choose to design with, and the way our structural connections are detailed, can make all the difference in the success of our buildings and the safety of their occupants during and after a seismic event. 
Salvadori, Mario. Why Buildings Stand up: the Strength of Architecture. W.W. Norton, 2002.
About the Author: Erin E. Kelly

Ms. Kelly is an experienced structural engineer with a focus on seismic risk. She has extensive experience in structural failure investigations, seismic structural design, and seismic risk assessments. Through the School of P.E., she has taught a 32-hour course for the California Seismic P.E. Exam, authored several blog posts, and contributed to other review products. She has a Bachelor of Science in Civil Engineering from Johns Hopkins University and a Masters of Engineering in Structural Engineering from Lehigh University.

Monday, 29 June 2020

California's Current and Former Structural Ordinances

In the previous blog post, we discussed that notable earthquakes often lead to changes in the upcoming edition in the building code, or at the least spur research to that effect. What about the buildings that were approved under prior building codes, but based on what we know now, may prove to be unsafe? Cities and states have the ability to pass acts and ordinances, which can mandate the retrofit of such structures. 
We saw the first instance of this with the Field Act of 1933, in which all public-school buildings were required to be upgraded to be earthquake compliant. We also saw it in the Alfred E. Alquist Extension in 1994, which mandated that all hospitals must be earthquake-code compliant by 2030-work for which is still ongoing. 
Currently, the most urgent and widespread ordinances are for buildings with soft stories. These ordinances are in place in several cities throughout California, but we'll specifically discuss those of San Francisco and Los Angeles since those are the two largest municipalities. 
First, what defines a building with a 'soft story'? A soft story is defined to be a story in which the structural stiffness is calculated to be less than 70% of the stiffness of the story above or less than 80% of the average story stiffness of the three stories above. This configuration has been shown to suffer large ground floor displacements, leading to structural damage and even collapse during a seismic event. 
The 1971 San Fernando Earthquake and the 1994 Northridge Earthquake both caused significant damage to buildings with soft stories in the Los Angeles area, and the 1989 Loma Prieta Earthquake caused similar damage in the San Francisco Bay Area. 
In San Francisco, the seismic ordinance applies to wood-frame buildings with three or more stories, which were permitted for construction before January 1, 1978. The ordinance was rolled out in tiers, beginning with Tier 1, which included buildings used for education, assembly, or daycare. Tier 2 consisted of buildings with 15 units or more; Tier 4 consisted of buildings with ground-floor commercial use, or buildings located in a liquefaction zone; and Tier 3 consisted of buildings not falling into one of the other tiers. About 5,000 of the buildings in the city of San Francisco were subject to this ordinance. The tiers were used to stagger the mandatory completion dates with all seismic retrofits required to be completed by this year, 2020. 
The mandatory ordinance in Los Angeles encompasses a much larger amount of buildings-nearly 13,500 (compared to San Francisco's 5,000). The ordinance applies to wood-frame buildings permitted for construction before January 1, 1978, however, this ordinance also includes buildings with two stories. The Tiers are also slightly different, including that in the Los Angeles framework, they are called Priority levels. Priority 1 is for buildings with 16 units or more; Priority 2 is for buildings with three or more stories (less than 16 units); and Priority 3 is for buildings not included in Priority 1 or 2, which would mean two-story buildings with fewer than 16 units. The Ordinance states that from time of notice, the owner has two years to submit either proof of prior retrofit, or plans to retrofit and demolish; three and a half years to obtain a permit to start either construction or demolition; and seven years to complete construction. Following this framework, retrofit completion dates in order of Priority are 2022, 2023, and 2024. 
While there is still a lot of work to do, we can have confidence in the fact that progress is underway and the cities in California will be much more resilient to earthquakes in the coming years. 
About the Author: Erin E. Kelly

Ms. Kelly is an experienced structural engineer with a focus on seismic risk. She has extensive experience in structural failure investigations, seismic structural design, and seismic risk assessments. Through the School of P.E., she has taught a 32-hour course for the California Seismic P.E. Exam, authored several blog posts, and contributed to other review products. She has a Bachelor of Science in Civil Engineering from Johns Hopkins University and a Masters of Engineering in Structural Engineering from Lehigh University.

Monday, 22 June 2020

Lessons from the ASCE 41 Basic Checklist

As you may be aware, there is a document used in assessing the seismic performance of existing structures entitled, ASCE 41 - Seismic Evaluation and Retrofit of Existing Buildings. Among other topics, this guide offers instruction for basic assessment of seismic vulnerabilities through "checklists" on general building configurations as well as one specific checklist for each building type. The checklist on configurations is used for all building types and is referred to as the "Basic Checklist." 
A quick scan through the Basic Checklist will highlight several of the concepts that you'll need to be comfortable with as you prepare for the CA Seismic P.E. exam, so I thought it would be helpful to run through some of them here. 
Consider a building you know well as you go through this list. Maybe it's a building you designed, or maybe it's the one you're sitting in right now.
Here are some of the criteria:
Load Path: The structure shall contain a complete, well-defined load path, including structural elements and connections, that serves to transfer the inertial forces associated with the mass of all elements of the building to the foundation. 
 As we covered previously, lateral loads are applied to the exterior walls of the building, then transferred to the diaphragm, then to the vertical elements of the LFRS, then to the foundations. Each of these elements needs to be sufficiently connected (i.e. dowels in concrete construction, bolts/welds in steel construction). Most buildings will pass this one. 
Adjacent Buildings: The clear distance between the building being evaluated and any adjacent building is greater than 4% of the height of the shorter building. 
 We cover this concept specifically in the course as we discuss both drift and separation. Pounding can cause considerable damage, particularly if the adjacent buildings are not the same height or do not have the same floor-to-floor heights. If the shorter building is displaced toward the taller building, and the contact point is between floor heights, the contact could occur at the midpoint of a column and cause catastrophic damage. If the buildings are the same height and experience contact during a seismic event, the damage will be less significant but could cause damage at the roof/wall connection. 
Weak Story, Soft Story, Vertical Irregularities, Geometry, Mass, Torsion:
 You should recognize each of these as some of the Horizontal and Vertical irregularities from ASCE 7. These irregularities were only codified in the 1994 Uniform Building Code (UBC), so buildings designed and constructed prior to the adaptation of the 1994 UBC are more likely to have these irregularities. Also notable is that weak story and soft story are listed here separately. While they are the result of similar configurations, "weak story" relates to strength and "soft story" relates to stiffness. 
Liquefaction, Slope Failure, Surface Fault Rupture: 
 These all relate to the soil below the structure. However, we now know that the soil conditions can be a large factor in how the buildings will behave during a seismic event. Liquefaction relates to a type of soil in which the cohesion between the soil particles is likely to decrease to a point of instability when saturated. This can occur during an earthquake, as was seen specifically in the 2011 Christchurch Earthquake. Slope Failure relates to landslide hazard, which is relatively common after an earthquake. Surface Fault Rupture relates to the proximity to the closest known fault. If a structure is located very close to a fault, the building could be damaged by the surface rupture during an earthquake. Based on recent legislation, structures shall not be built immediately on top of or within 50 feet of these fault lines. 
If you have time to review the building-type-specific checklists, you'll notice some of the improvements that we discussed in the Building Code Blog Post. These checklists are designed to show how much of the modern seismic detailing can be found in these existing structures, and I think they double as a great study tool for this exam.
About the Author: Erin E. Kelly

Ms. Kelly is an experienced structural engineer with a focus on seismic risk. She has extensive experience in structural failure investigations, seismic structural design, and seismic risk assessments. Through the School of P.E., she has taught a 32-hour course for the California Seismic P.E. Exam, authored several blog posts, and contributed to other review products. She has a Bachelor of Science in Civil Engineering from Johns Hopkins University and a Masters of Engineering in Structural Engineering from Lehigh University.

Monday, 15 June 2020

How is ASCE 7 Organized for Seismic Engineering

Besides signing up for this course, obtaining a copy of and getting comfortable with the latest version of ASCE 7 is the best thing you can do for yourself to prepare for the California Seismic P.E. exam. 
This test is fast paced, so the last thing you want to spend time doing is flipping through the code to find the information you need. 
Here's a quick overview of some important sections to get you started: 
Chapter 11 
Chapter 11 is used on the exam to determine the ground acceleration parameters, site class, and seismic design category. Section 11.4 includes formulas and tables to determine the site class, and Section 11.6 contains tables to determine the Seismic Design Category. As we discuss in the course, Seismic Design Category influences so much in a building's design including, but not limited to, permitted lateral systems, maximum building heights, lateral analysis procedures, restrictions on irregularities, and seismic detailing requirements. 
Chapter 12 
Chapter 12 contains the seismic design requirements for building structures, so for most of the exam, you'll be using this chapter. This blog post is by no means comprehensive, but I'll highlight a few of the important features. 
In my opinion, one of the most important tables in the whole code is Table 12.2-1. This should always be your starting point on the exam. It outlines each type of lateral force-resisting system, its corresponding seismic parameters for ductility, overstrength, and deflection amplification, and provides guidance on the applicability or appropriate building height limit in each seismic design category. This table is useful as a personal teaching tool or point of reference and is also a great place to start on any exam question. 
Table 12-3.1 describes each of the horizontal and vertical irregularities that are considered by the code. A building with any of these irregularities will require additional analysis or the consideration of additional seismic load, so it's important to review these definitions and commit them to memory. 
Section 12.8 outlines all the parameters needed for the Equivalent Lateral Force Procedure, from the seismic response coefficient, to base shear, to period, and deflection. If the building is permitted to be analyzed by this procedure (and for the purpose of the test, 99% of structures will be) this is where all your calculations should begin. 
Section 12.12 contains limits for allowable story drift. This is an easy place to pick up some points. Table 12.12-1 includes limits based on type of structure and risk category, but if you have a moment frame structure in Seismic Design Category D through F, be sure to consider section 12.12.1.1. 
The final section in Chapter 12 worth including here is Section 12.14-the "simplified alternative structural design criteria." There are many factors that will determine if you can use this section, and typically as far as the test is concerned, they will ask you to use this section if required. It's a simple way to determine the base shear, etc. for a building if it meets all the qualifications. 
Chapter 13 
Finally, Chapter 13, or more specifically, Tables 13.5-1 and 13.6-1 provide the ap, Rp, and Ωo values for nonstructural components. These will be used to determine their anchorage forces. 
As I said, this is in no means a full guide to ASCE 7, but if you are able to tab/bookmark/highlight these sections and get familiar with them, you'll save a lot of time on the test and, let's face it, we could all use some more time for this exam.
About the Author: Erin E. Kelly

Ms. Kelly is an experienced structural engineer with a focus on seismic risk. She has extensive experience in structural failure investigations, seismic structural design, and seismic risk assessments. Through the School of P.E., she has taught a 32-hour course for the California Seismic P.E. Exam, authored several blog posts, and contributed to other review products. She has a Bachelor of Science in Civil Engineering from Johns Hopkins University and a Masters of Engineering in Structural Engineering from Lehigh University.

Monday, 8 June 2020

Discussion on Building Frame vs. Bearing Wall Systems

As you may have already recognized, the load path for lateral loads differs greatly from that of gravity loads, and can, in some cases, be completely independent. 
Lateral loads are assumed to be applied initially to the faade of the structure or the exterior walls. The loads applied half-a-floor height above and below a given floor level are then assumed to be transferred to that level, which acts as a horizontal diaphragm. The loads are then transferred from the diaphragm to the vertical elements of the lateral force-resisting system either by tributary area or rigidity, based on the type of floor system. These vertical elements are what we typically refer to the whole system as the moment frames, shear walls, braced frame, etc. The lateral loads are finally resolved into the foundation at the ground level. 
In a case where the gravity system consists of slabs and beams supported by interior columns, which carry the loads to the foundation, the gravity and lateral load paths are essentially independent. In other cases, however, such as in conventional wood-frame structures or concrete tilt-up structures, the load paths overlap as the walls act both as lateral and gravity load-resisting elements. 
We identify these two types of load paths in the Code as Building Frame and Bearing Wall. Building Frames structures contain a separate load path for gravity and lateral loads. The Bearing Wall structures involve elements that act simultaneously as gravity and lateral load-resisting elements. 
Building frame systems are preferred for several reasons, but one major advantage is that they allow for the stiffness of the structure to the maintained through a limited number of elements. 
To understand the importance of this, we must consider one of the serviceability functions of the lateral load-resisting system, which is to limit the deflections in the structure. Deflections need to be limited in order to avoid structural damage, plastic deformations, increased load effects due to the P-Delta effect, and, importantly, occupant comfort. 
If the entire structure were to be designed to achieve this purpose, the building would need to be extremely stiff, heavy, and expensive. Instead, if we separate the two systems, and make just the lateral system sufficiently stiff, a considerable amount of both labor and materials can be saved. 
In the book Why Buildings Stand Up, Mario Salvadori explores this concept as it applied to steel-framed skyscrapers. Salvadori explains, "One must be aware that in steel construction, rigid or moment connections are costly. They require specialized manpower and dangerous work at great heights. Their cost may represent 10% of the entire cost of the structure. But, if the inner core were stiff enough, one could forsake the rigid connections between the beams and columns of the exterior frames and use much cheaper connections, which allow beams and columns to rotate with respect to each other, as if they were hinged. Such hinged, or shear, connections could not be used without a core since the frame would collapse like a house of cards, but they are economical and practical if the core stands up rigidly and the outer hinged frame leans on it. The separation of the two structural functions is now complete." 
You can see through this quote that the separation of the gravity and lateral systems has allowed us to build bigger, taller, and stronger structures while being economical and practical in our design choices. This division is now codified in seismic engineering and plays a key role in how lateral systems are selected and evaluated.
About the Author: Erin E. Kelly

Ms. Kelly is an experienced structural engineer with a focus on seismic risk. She has extensive experience in structural failure investigations, seismic structural design, and seismic risk assessments. Through the School of P.E., she has taught a 32-hour course for the California Seismic P.E. Exam, authored several blog posts, and contributed to other review products. She has a Bachelor of Science in Civil Engineering from Johns Hopkins University and a Masters of Engineering in Structural Engineering from Lehigh University.

Monday, 1 June 2020

How Hard is the California Seismic P.E.?

Before I answer this question, I feel that I should give you a quick summary of my background: I'm originally from the East Coast, meaning that I never took a course in seismic engineering at any point in my education. I dove in headfirst when I moved to California and decided to take this exam. I remember being told "it's easy!" by so many people, only to fail the first time I took the exam. The second time around, I studied hard and was able to pass. 
Personally, I found the exam to be challenging, but not tricky. With the right preparation and a good understanding of the principles of seismic engineering, this exam is very doable. To me, the level of difficulty comes down to several factors, which I'll get into here: 

1. The exam is fast
We're talking 55 problems in 2.5 hours. Gone are the days of 40 questions in 4 hours (assuming you've passed the national P.E. exam). This breaks down to just over 2 minutes per problem. There will be some definition questions, but don't rely on these to give you extra time on the calculation-based questions. My experience was that there are a lot of calculations to be done during the exam, so make sure you're prepared to tackle these with the necessary speed. 
2. It matters that the engineers who pass this exam are proficient in seismic engineering
Understanding the code requirements and engineering philosophy behind seismic engineering could not be more important if you plan to practice engineering in California or any other seismically active region. As structural engineers, we design for a "life safety" criteria, which is literally another way of saying our work could be the difference between life and death for ourselves and our fellow citizens. That's just to say, if this exam seems hard, it's for good reason. I have a great respect for this exam and the way it pushes the engineers of California to be true experts in what we do. 
3. Not everyone learned seismic engineering in college
I firmly believe that this exam will be "hard" or "easy" based on where you went to college-literally the geographical WHERE. I went through both undergrad and grad school without taking a single course on seismic engineering, so this exam challenged me to turn everything I know sideways and learn new material. While I was doing that, my California native colleagues were saying to me, "The Seismic P.E. is easy! It's just everything we learned in college!" If you're not from California, that's OK. See this as an opportunity to get up to speed. 
4. Do you really want to do this again? 
This question is how I've approached each of these licensing exams-The F.E., the national P.E., and both California state exams. You're going to put your life on hold (to some extent) to prepare for these exams. It's so worth it to apply yourself now, pass, and never look back. There is nothing wrong with over studying! 
How Hard is the California Seismic P.E.?
Bottom line: this exam is hard. It's designed to be hard so that we, and the rest of the population, can have confidence in the engineers designing our structures. But you made it this far! If you're reading this, you likely have one or more degrees in engineering and achieving that was a challenge too. I have no doubt you can rise to this challenge and succeed.
About the Author: Erin E. Kelly

Ms. Kelly is an experienced structural engineer with a focus on seismic risk. She has extensive experience in structural failure investigations, seismic structural design, and seismic risk assessments. Through the School of P.E., she has taught a 32-hour course for the California Seismic P.E. Exam, authored several blog posts, and contributed to other review products. She has a Bachelor of Science in Civil Engineering from Johns Hopkins University and a Masters of Engineering in Structural Engineering from Lehigh University.

Monday, 25 May 2020

A Chronology of Improvements in the Building Code for Seismic Design

Considering the several chapters in the latest ASCE 7 that are devoted exclusively to seismic provisions, along with the sheer breadth of the exam you're currently preparing for, it may surprise you to know that the first structural seismic provisions in the United States weren't published until 1959. Not only that, but after the so-called "Blue Book" was published in 1959, the guidance remained largely unchanged until after the 1971 San Fernando Earthquake. 
Since then, the Uniform Building Code (UBC) and, more recently, the International Building Code (IBC), have been repeatedly updated to reflect new research, typically spurred by common failure mechanisms observed after a major earthquake. 
Below we'll cover some of the major earthquakes, the damage observed, and the developments in the subsequent codes. I hope this serves to provide some context to the seismic code provisions and sheds some light on the importance of seismic engineering. 
The 1933 Long Beach Earthquake 
The 1933 Long Beach Earthquake exposed the vulnerability of unreinforced masonry (URM) structures. According to the Federal Emergency Management Agency (FEMA), 86% of the URM structures in the city of Long Beach suffered significant structural damage or collapse as a result of this earthquake. This observed damage spurred the adoption of the Field Act of 1933 which, among other things, specified specific design forces for important public structures such as schools. 
The "Blue Book" (1959) 
In 1959, the Structural Engineers Association of California (SEAOC) published the first edition of the Recommended Lateral Force Requirements and Commentary (also known as the "Blue Book"), to standardize and share the latest seismic design knowledge. These provisions were later adopted into the 1961 UBC. 
One development in seismic performance that was adopted during this period was proper out-of-plane anchorage at the connection of wood framed members and concrete foundation elements. 
The 1971 San Fernando Earthquake 
In 1971, the San Fernando Valley (near Los Angeles) experienced a 6.5 magnitude earthquake, which killed about 60 people. 
Common damage observed included the failure of roof-to-wall anchorage in concrete tilt-up structures, which relied on a bolted wood ledger acting in cross-grain bending. This connection type was found to be inadequate and an update was nearly immediately made to the 1973 UBC. 
As more research was done after the earthquake, other provisions were written and added to the 1976 UBC. These included the first provisions on ductile detailing for concrete structures, increased design forces for wall anchorage in concrete tilt-up structures, and a change in the calculation approach to determine the shear capacity of wood-framed shear walls. 
Continued Research through the 1980s 
While there were no notable earthquakes that spurred code upgrades in the early 1980s, the 1982 and 1988 UBC editions included major improvements in seismic provisions and lateral force resistance. These improvements included stricter building drift limits, increased provisions for wall anchorage, and increased detailing for ductility in concrete and masonry shear walls. 
The 1994 Northridge Earthquake 
In 1994, the northern region of Los Angeles experienced another major earthquake-this one with a magnitude of 6.7, killing 57 people. 
The most notable damage observed following the Northridge Earthquake was in the form of failure at beam-column connections in steel moment frames. It was determined that the welded connections were inadequate in a major seismic event. Several improvements were developed with regard to welding technologies including an increase in weld-metal toughness requirements, the removal of backing bars, and the regulation of the workmanship and welding quality. The building code also moved away from using a prescriptive detail and moved toward performance-based criteria. 
Present and Future Codes 
Research continued following the 1994 Northridge earthquake, and several more improvements were adopted in to the 1997 UBC. The 1997 UBC is generally considered the "benchmark" building code for several building types, indicating that the seismic provisions developed by the adoption of this building code were sufficient for the life safety limit state. 
A Chronology of Improvements in the Building Code for Seismic Design
The building code will continue to evolve, and will no doubt become even longer as it does. I hope this gave some context to some of the major upgrades over the last 100 years and will get you up to speed with some of the lessons learned. 
References:
https://www.fema.gov/media-library-data/20130726-1442-20490-5595/fema_313.pdf
About the Author: Erin E. Kelly

Ms. Kelly is an experienced structural engineer with a focus on seismic risk. She has extensive experience in structural failure investigations, seismic structural design, and seismic risk assessments. Through the School of P.E., she has taught a 32-hour course for the California Seismic P.E. Exam, authored several blog posts, and contributed to other review products. She has a Bachelor of Science in Civil Engineering from Johns Hopkins University and a Masters of Engineering in Structural Engineering from Lehigh University.