


 FE Courses
 PE Courses
 SE Courses
 Continuing Education
 Pmp Courses
 Corportate Training
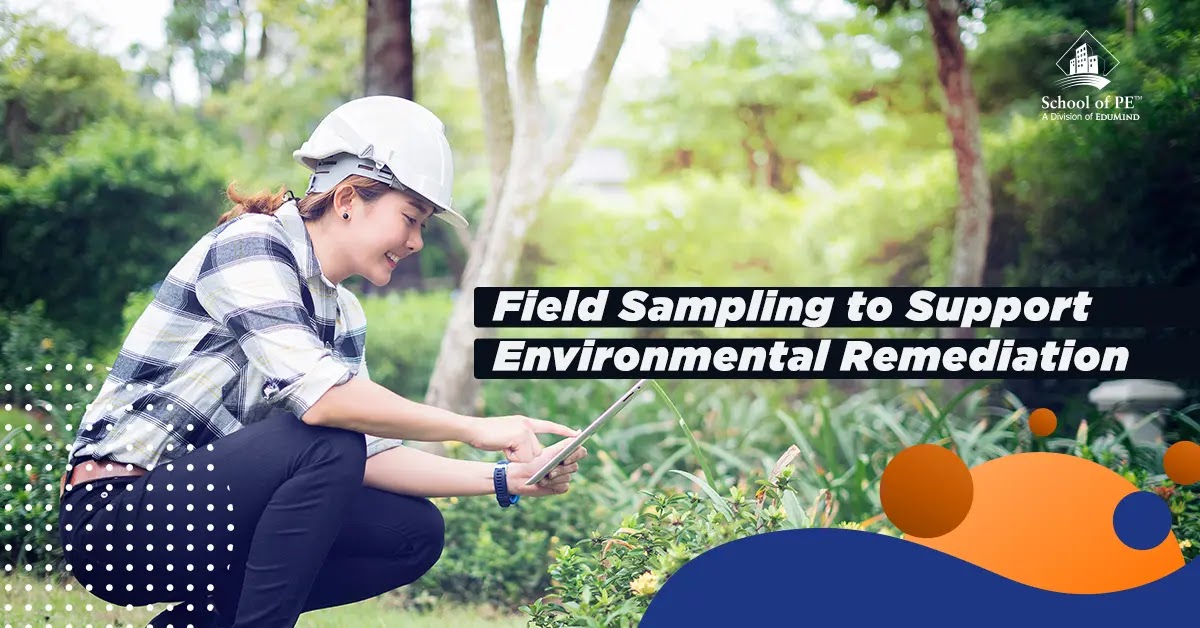
Are you interested in what remediation engineers do? As a remediation engineer, my work revolves around the cleanup and restoration of contaminated sites. There are many steps involved in remediating a site, which can take years from start to finish. The first step for remediating a site is determining the extent of contamination by conducting environmental field sampling.
1. Environmental Field Sampling
Environmental field sampling encompasses multiple media - soil, groundwater, sediment, surface water, or air. The media sampled is dependent on the site, its history, and whether any previous remedial investigations have been performed. Sampling data allows us to determine the nature and extent of contamination and to refine the conceptual site model to give us a better understanding of how the contamination occurred and to inform the remedy selection.
Environmental field sampling is a great introduction to remediation for any entry-level environmental engineer. By participating in field sampling, a new engineer learns both technical and leadership skills by managing a team, performing a task, and executing it to completion. Most of my field experience was spent groundwater sampling, so I'll talk you through what a typical week spent groundwater sampling is like.
2. Former Pesticide Manufacturing Facility Site
The site we are working on together this week is a former pesticide manufacturing facility. It's in a small, rural town, and the site is a large, empty parcel. The groundwater from the site is contaminated with chlorinated volatile organic compounds and semi-volatile organic compounds. It's also contaminated with some metals, including arsenic. This site is based on a site I manage in real life. When I started on this project over ten years ago, I was a junior engineer assisting with field sampling. I eventually became the field manager before being responsible for data interpretation and analysis for remedy selection. Now I am responsible for the remedy implementation, which has been very rewarding.
3. Sampling New Wells
Our job this week is to sample the new wells that were installed last month to help us delineate the extent of the plume which has extended off-site on neighboring parcels. Fortunately, we've confirmed through previous studies that this contamination doesn't extend to the deeper aquifer where residents get their drinking water.
4. Before the Sampling Event
First, we'll need to prepare for the sampling event. We will need to review the data from previous groundwater monitoring events to determine the clean-to-dirty order for sampling wells. Even though we clean all our equipment through a three-step rinse after each well is sampled, this step is still important since we'll want to minimize cross-contamination as much as possible.
We'll also need to order our equipment. The type of equipment we procure will depend on the site contaminants of concern (COCs) and depth to groundwater. But typically, we'll get a pump, water level meter, and water quality meter to help us monitor parameters as we sample, like temperature, dissolved oxygen, and specific conductivity. We will also work closely with the project chemist to determine the number of samples we'll need to take for what COCs and what quality control samples are needed.
We'll need to bring a site map, any logs, and labels for sampling, sampling bottles, sampling equipment, and a field kit, which will usually consist of a standard set of tools and random items like fishhooks (in case you drop something in the well and need to fish it out - it certainly happens!).
We'll also need to make sure we have 55-gallon drums at the site to containerize our purge water from each well. This purge water is tested separately to help us understand whether it is hazardous or non-hazardous waste, which determines what kind of landfill the drum is transported to.
We'll also need to make sure we bring all our safety gear. This typically includes the site-specific health and safety plan (HASP), safety glasses, nitrile gloves, and steel-toed boots. Depending on the site conditions and/or client, we may also need to bring a hard hat, hi-visibility vest, or other safety gear. For the site we're sampling at together this week, we don't have any client-specific safety requirements. However, we'll want to bring snake chaps and steel-toed rain boots since the site gets very soggy when it rains. We will also bring light, breathable clothing for our time spent in the sun, along with a hat, sunscreen, and insect repellant with DEET.
5. Upon Arrival
Once we drive to the site, we'll have a health and safety tailgate meeting and talk about the potential hazards we might encounter. Today this means heat stress and biological hazards (snakes, friendly ticks desperate to hitch a ride, mosquitoes, and fire ants and wasps that love setting up real estate right next to the wells). It's supposed to rain today, so we'll need to be careful about driving around the site. We've gotten the truck stuck in mud before on this site, and the nearest towing company is 30 minutes away.
We start our day by conducting a synoptic gauge. This means we'll measure the depth to water in each well, along with the total depth of the well (if needed). This will help capture the potentiometric surface of the aquifer(s) we are collecting samples from. We will also use this synoptic gauge to perform an inspection of the monitoring wells to determine whether any need repairs. For example, are any locks missing? Are the concrete well pads cracked? Are there any wasp nests inside the well? We've learned to open well caps from behind for that reason - it's a nasty surprise to open a well and have a wasp fly in your face.
6. Recording Water Quality Parameters
Once we are done with the synoptic gauge, we'll start sampling with the cleanest well first. Once we set up the pump, we'll write down water quality parameters (typically depth to water, temperature, specific conductivity, turbidity, oxidation reduction potential, and dissolved oxygen) at predetermined intervals (usually every 3 to 5 minutes). With low-flow sampling, we'll need to keep the flow generally between 100 to 250 milliliters per minute to avoid stressing the aquifer and to collect a representative sample. Once our readings are generally consistent, it means that the well is stabilized and we can collect a sample. We'll want to make sure our samples are collected per the standard operating procedures for the project and/or client.
Once we are done collecting our samples, we'll clean our equipment using a three-step rinse. Then it's time to tidy up, dump our purge water in the 55-gallon drum, and head to the next well.
7. Groundwater Sampling
Groundwater sampling is fun but can consist of long, tiring days. For the site we're working on together, we have to wake up early to beat the heat. We also have to ship samples every day. The closest FedEx is 30 minutes away, and the last pickup is at four. Packing the coolers to ensure the samples arrive safely and within temperature requirements (i.e., lots of ice) takes time and care, and making sure the cooler is delivered on time before the last pickup is a daily adventure.
8. Flexibility During Fieldwork
Field work means thinking quickly when something goes wrong. Did the pump break? Learn to fix it. Is the site muddy? Time for someone to walk a path to the wells to make sure the site is drivable. Is a baby cow trying to eat your well keys, or the cows won't move out of the way? (You'd be surprised how obstinate and belligerent cows can be, even with a truck honking at them to move out of the way). You can't find a well? Have to fish out tubing that fell into the well? Are random people wandering on site and into your workspace? Did the well go dry and is no longer producing water? Is there a large swarm of bees heading your direction while you are sampling? All of these are things that have happened to me in the field. Learning to react quickly to solve problems is a necessary skill for success.
Conclusion
After a long week, we've sampled our last well. We cleaned up and containerized our trash and collected composite samples of the purge water. We drop off samples at FedEx and drive back home, accomplished and eager to see the data so we know what the next steps are.
And what are the next steps? We'll likely need to continue monitoring so we have enough data to determine trends. As we get a better idea of plume stability and data trends, we can start evaluating potential remedies for the site. Depending on the data trends, COCs and concentrations, and cleanup requirements set by the applicable regulatory agency, the remedy can be anything from monitored natural attenuation (which relies on physical, chemical, or biological processes to reduce the concentrations of contaminants without an active remedy), to groundwater injections which involve injection of an amendment to chemically break down the contaminants. There are many different groundwater remedies that can be selected for a site which we'll discuss for the next installment!
Do you want to pursue a career in environmental engineering? Consider partnering with School of PE, a leading exam prep provider, to help you succeed with confidence!
No comments :
Post a Comment