Monday, 27 July 2020

The Five Best Ways to Prepare for the CA Surveying Exam

1. Take a course 
While preparing to take the California Surveying Exam (CSE), I found that there isn't one specific book that you can use as an exam review manual. Instead, my coworkers at the time presented me with five different textbooks I could use, with no real guidance or certainty on which one would be best. Beyond that, those texts were meant to go way deeper than the exam on many topics. Taking a course, in my opinion, is the best way to identify what is important on the exam and not waste time on topics that won't be tested.
2. Get familiar with your graphing calculator 
The calculator permissions on this exam are different than others, and that means you can use a graphing calculator here. That is great news because you'll frequently be asked to convert Degrees Minutes Seconds to Degrees (in decimal form), either as the whole problem or a part of the problem. Sure, you could do it by hand, but you really won't have time for that! These calculators can be expensive but it's a worthy investment! (Tip: Ask a friend, classmate, or coworker to borrow theirs if you don't have one). 
3. Create an easy reference guide 
Whether you make a cheat sheet or tab formulas in your notebook, it's really important to have conversions (how many square feet are in an acre?) and formulas (area and curve) easily accessible to get through this exam. 
4. Practice, practice, practice 
I can't say this enough-practicing is so important. They can frame the question so many different ways, so you need to be really familiar with the information. Once you are well-versed in the material, it should be easy to identify what is being asked and how to plug it into the formulas you have. 

The Five Best Ways to Prepare for the CA Surveying Exam
5. Become invested
One of the best "study strategies" I've found is to become really invested in the material. Change your attitude and try to find the content fascinating. At the time that I was preparing for this exam, I was doing design engineering work. I would look at some of my supporting material and get excited to see the bearings and easements and all the fun stuff you'll learn while preparing for the test. It not only makes the prep time more bearable, but it also will help the information stick!
About the Author: Erin E. Kelly

Ms. Kelly is an experienced structural engineer with a focus on seismic risk. She has extensive experience in structural failure investigations, seismic structural design, and seismic risk assessments. Through the School of P.E., she has taught a 32-hour course for the California Seismic P.E. Exam, authored several blog posts, and contributed to other review products. She has a Bachelor of Science in Civil Engineering from Johns Hopkins University and a Masters of Engineering in Structural Engineering from Lehigh University.

Monday, 20 July 2020

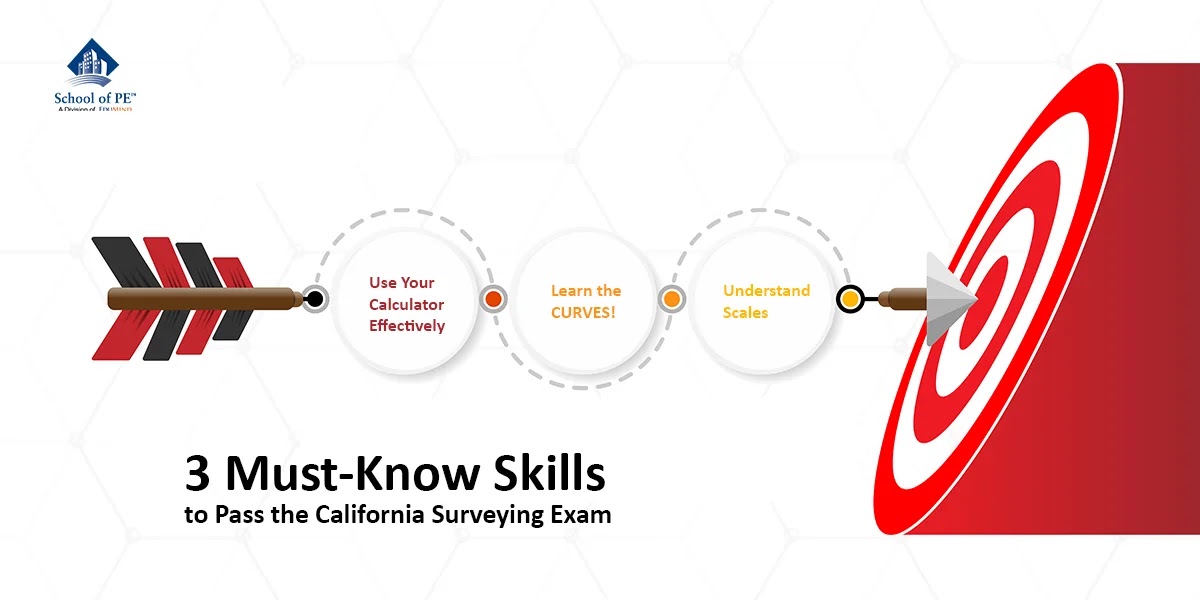
Three Must-Know Skills to Pass the California Surveying Exam

1. How to MOST Effectively Use Your Calculator 
This may not be the first thing that comes to mind when you think of "skills" needed to pass the California Surveying Exam (CSE), but trust me, using a graphing calculator is going to be absolutely crucial to your success. This is because the CSE is a test of not only knowledge but speed as well. You need to know the material well enough to recall it quickly, and you also need to have the calculator skills to avoid spending too much time on computation. The main thing the graphing calculator will help you with is converting from Degrees Minutes Seconds to a decimal form of degrees, so that you can plug that single value into the equations you'll be using. A normal calculator won't be able to help you do the conversion as quickly. Check the latest requirements on calculators to make sure your calculator is permitted and note that the requirements for this exam differ from other PE exams. 
2. CURVES! 
I've heard that horizontal and vertical curves can make up about 40-50% of the questions on the exam. Those values are empirical but, from my experience, I would say it's close. These concepts are very important to surveying, so get comfortable with them. Internalize the formulas, know how to recognize them, know all the tricks, and practice, practice, practice. I tend to tab my notes and books for these exams, and I tabbed the pages for vertical and horizontal curves in a different color than everything else so that I could find them quickly during the exam. 
Three Must-Know Skills to Pass the California Surveying Exam
3. Understand Scales
Scale factors may seem like a straightforward concept, but they are a really easy way to gain or lose points on the exam. There are a lot of ways that the issue of scale can come up. I'll list some examples here: 
 If you want to show X feet of distance on a Y" sheet of paper, what scale should be used? 
 Which scale is larger 1" = 1 mile or 1/1000? 
 If the Scale Factor is X, and the measured distance is Y, what is the real distance? 
 The scale is 1:10, and what is the real area of a measured rectangle with side lengths of X and Y? 
There's a lot packed into these four questions, and you should be familiar with each of these concepts. I would recommend practicing questions regarding scale and checking your answers after. You may be surprised by how often you get tripped up by not considering units, not considering length scales vs. area questions, or deciding between a "large" and "small" scale. It's worth spending time on this topic to make sure you never make a silly mistake.
About the Author: Erin E. Kelly

Ms. Kelly is an experienced structural engineer with a focus on seismic risk. She has extensive experience in structural failure investigations, seismic structural design, and seismic risk assessments. Through the School of P.E., she has taught a 32-hour course for the California Seismic P.E. Exam, authored several blog posts, and contributed to other review products. She has a Bachelor of Science in Civil Engineering from Johns Hopkins University and a Masters of Engineering in Structural Engineering from Lehigh University.

Monday, 13 July 2020

Everything You Need to Know About the CA Surveying Exam

The California Surveying Exam is part of the California Civil Professional Engineering License. Once you pass the national PE-the long, sometimes dreaded, 8-hour breadth exam-you can take both the CA Seismic and CA Surveying exams. Both of these are required in order to obtain your PE license in California. 
The CA Surveying exam is a 2.5-hour test with 55 questions, which gives you fewer than three minutes per question. If you remember from preparing for the breadth exam, you get six minutes per question on that one. So, get ready to increase your speed! 
The CA Surveying exam is computer based and offered most days of the year. You will receive an Authorization to Test (ATT) from the Board of Professional Engineers, Land Surveyors, and Geologists with your identification number, test name, and eligible dates which you will use to schedule your exam. 
From there, you're on your own to study and prepare for the exam. I've written a few other blog posts on this topic, but my main study tips are to focus on the important topics (you can determine this through online research or by taking a prep course); invest in a graphing calculator, and get comfortable with it; make a cheat sheet with useful conversions and formulas for easy reference; and do as many practice problems as possible! 
On test day, I advise you to get to the test center early, have all of your references bound (free sheets of paper are not allowed, so make sure to put your cheat sheet in a binder or notebook), and have a sweater with you in case the room is cold. The test center should provide earplugs, noise-canceling headphones, tissues, writing paper, and a writing utensil. Go into the test confident and focused, and it'll be over before you know it! 
I can't say with certainty, but I found that test results are released on the ninth or 10th of the month after you take the exam. For example, I took the Seismic exam on the sixth of the month and had to wait for what felt like a really long time to get my results. Then, I intentionally took the Surveying exam on the 25th of the month so I could minimize the wait time. 
I hope this helped you feel more comfortable with what to expect. This test is totally doable with good preparation. Best of luck! 
School of PE offers comprehensive exam review courses for the CA Seismic and CA Surveying exams. Visit our website to register for a prep class that best fits your schedule.
About the Author: Erin E. Kelly

Ms. Kelly is an experienced structural engineer with a focus on seismic risk. She has extensive experience in structural failure investigations, seismic structural design, and seismic risk assessments. Through the School of P.E., she has taught a 32-hour course for the California Seismic P.E. Exam, authored several blog posts, and contributed to other review products. She has a Bachelor of Science in Civil Engineering from Johns Hopkins University and a Masters of Engineering in Structural Engineering from Lehigh University.

Monday, 6 July 2020

What is ductility and why is it important for earthquake resistant structure?

I've heard ductility referred to as the "secret sauce of seismic engineering," and I think that's truly the perfect way to describe it. But maybe you've heard this before and don't know why or how it is true? I hope this blog can shed some light on that for you. 
Ductility is technically defined as the "ability to withstand cyclic deformations," and as such is not directly related to flexibility or stiffness. Flexibility and stiffness are measurements of how far an element will deflect under a given force, whereas ductility is more about how the element will deflect, especially at yielding and beyond. In the simplest of terms, a ductile structure will bend and not break, which greatly reduces the risk of a catastrophic failure. 
As an example, consider an unreinforced masonry shear wall, which will crack and fail in a brittle manner during an earthquake, compared to a steel moment frame which, ideally, will sustain large deflections, deform elastically, and resist collapse during the seismic event. 
A book by Mario Salvadori titled Why Buildings Stand Up does a great job of illustrating the concept of ductility, so I'll borrow from him here. Salvadori writes of ductile materials, "materials that behave elastically under relatively small loads and plastically under higher loads do not reach their breaking point suddenly. Once they stop behaving elastically, they keep stretching (or shortening) under increasing loads until they continue to so even without an increase in loads. Only then they fail. If a steel wire is weighted heavily enough, it will keep stretching or yielding under a constant load. It thus gives warning of its impending failure." 
If you reread that last paragraph, while visualizing the stress-strain curve of steel, you can see the great impact of ductility and how it can increase the resiliency of our structures. Salvadori explains that by bending without breaking, ductile materials give a "warning" that they're going to fail, as opposed to brittle structures that fail with no warning and often in a catastrophic manner. This allows for the safe evacuation of occupants which is ultimately the goal of our structures in seismic regions. 
This, of course, causes me to reflect on the limit state to which we design our structures: life safety. There are technically four limit states, listed here with increasing damage: operational (no damage), immediate occupancy, life safety, and collapse prevention. By choosing "life safety" as the industry standard, we are agreeing to design to a standard in which damage can occur, but only to the extent in which occupants will be able to evacuate safely. If construction in seismic regions were done with more brittle materials, this standard would not be able to be achieved, as the failure would be sudden, with no warning. By using ductile materials, we are given warning, and can accept a lower limit state without worrying about a sudden, dangerous, and potentially deadly collapse. 
I hope that this has provided some insight into the importance of ductility outside of just the numbers and the code. The materials we choose to design with, and the way our structural connections are detailed, can make all the difference in the success of our buildings and the safety of their occupants during and after a seismic event. 
Salvadori, Mario. Why Buildings Stand up: the Strength of Architecture. W.W. Norton, 2002.
About the Author: Erin E. Kelly

Ms. Kelly is an experienced structural engineer with a focus on seismic risk. She has extensive experience in structural failure investigations, seismic structural design, and seismic risk assessments. Through the School of P.E., she has taught a 32-hour course for the California Seismic P.E. Exam, authored several blog posts, and contributed to other review products. She has a Bachelor of Science in Civil Engineering from Johns Hopkins University and a Masters of Engineering in Structural Engineering from Lehigh University.

Monday, 29 June 2020

California's Current and Former Structural Ordinances

In the previous blog post, we discussed that notable earthquakes often lead to changes in the upcoming edition in the building code, or at the least spur research to that effect. What about the buildings that were approved under prior building codes, but based on what we know now, may prove to be unsafe? Cities and states have the ability to pass acts and ordinances, which can mandate the retrofit of such structures. 
We saw the first instance of this with the Field Act of 1933, in which all public-school buildings were required to be upgraded to be earthquake compliant. We also saw it in the Alfred E. Alquist Extension in 1994, which mandated that all hospitals must be earthquake-code compliant by 2030-work for which is still ongoing. 
Currently, the most urgent and widespread ordinances are for buildings with soft stories. These ordinances are in place in several cities throughout California, but we'll specifically discuss those of San Francisco and Los Angeles since those are the two largest municipalities. 
First, what defines a building with a 'soft story'? A soft story is defined to be a story in which the structural stiffness is calculated to be less than 70% of the stiffness of the story above or less than 80% of the average story stiffness of the three stories above. This configuration has been shown to suffer large ground floor displacements, leading to structural damage and even collapse during a seismic event. 
The 1971 San Fernando Earthquake and the 1994 Northridge Earthquake both caused significant damage to buildings with soft stories in the Los Angeles area, and the 1989 Loma Prieta Earthquake caused similar damage in the San Francisco Bay Area. 
In San Francisco, the seismic ordinance applies to wood-frame buildings with three or more stories, which were permitted for construction before January 1, 1978. The ordinance was rolled out in tiers, beginning with Tier 1, which included buildings used for education, assembly, or daycare. Tier 2 consisted of buildings with 15 units or more; Tier 4 consisted of buildings with ground-floor commercial use, or buildings located in a liquefaction zone; and Tier 3 consisted of buildings not falling into one of the other tiers. About 5,000 of the buildings in the city of San Francisco were subject to this ordinance. The tiers were used to stagger the mandatory completion dates with all seismic retrofits required to be completed by this year, 2020. 
The mandatory ordinance in Los Angeles encompasses a much larger amount of buildings-nearly 13,500 (compared to San Francisco's 5,000). The ordinance applies to wood-frame buildings permitted for construction before January 1, 1978, however, this ordinance also includes buildings with two stories. The Tiers are also slightly different, including that in the Los Angeles framework, they are called Priority levels. Priority 1 is for buildings with 16 units or more; Priority 2 is for buildings with three or more stories (less than 16 units); and Priority 3 is for buildings not included in Priority 1 or 2, which would mean two-story buildings with fewer than 16 units. The Ordinance states that from time of notice, the owner has two years to submit either proof of prior retrofit, or plans to retrofit and demolish; three and a half years to obtain a permit to start either construction or demolition; and seven years to complete construction. Following this framework, retrofit completion dates in order of Priority are 2022, 2023, and 2024. 
While there is still a lot of work to do, we can have confidence in the fact that progress is underway and the cities in California will be much more resilient to earthquakes in the coming years. 
About the Author: Erin E. Kelly

Ms. Kelly is an experienced structural engineer with a focus on seismic risk. She has extensive experience in structural failure investigations, seismic structural design, and seismic risk assessments. Through the School of P.E., she has taught a 32-hour course for the California Seismic P.E. Exam, authored several blog posts, and contributed to other review products. She has a Bachelor of Science in Civil Engineering from Johns Hopkins University and a Masters of Engineering in Structural Engineering from Lehigh University.

Monday, 22 June 2020

Lessons from the ASCE 41 Basic Checklist

As you may be aware, there is a document used in assessing the seismic performance of existing structures entitled, ASCE 41 - Seismic Evaluation and Retrofit of Existing Buildings. Among other topics, this guide offers instruction for basic assessment of seismic vulnerabilities through "checklists" on general building configurations as well as one specific checklist for each building type. The checklist on configurations is used for all building types and is referred to as the "Basic Checklist." 
A quick scan through the Basic Checklist will highlight several of the concepts that you'll need to be comfortable with as you prepare for the CA Seismic P.E. exam, so I thought it would be helpful to run through some of them here. 
Consider a building you know well as you go through this list. Maybe it's a building you designed, or maybe it's the one you're sitting in right now.
Here are some of the criteria:
Load Path: The structure shall contain a complete, well-defined load path, including structural elements and connections, that serves to transfer the inertial forces associated with the mass of all elements of the building to the foundation. 
 As we covered previously, lateral loads are applied to the exterior walls of the building, then transferred to the diaphragm, then to the vertical elements of the LFRS, then to the foundations. Each of these elements needs to be sufficiently connected (i.e. dowels in concrete construction, bolts/welds in steel construction). Most buildings will pass this one. 
Adjacent Buildings: The clear distance between the building being evaluated and any adjacent building is greater than 4% of the height of the shorter building. 
 We cover this concept specifically in the course as we discuss both drift and separation. Pounding can cause considerable damage, particularly if the adjacent buildings are not the same height or do not have the same floor-to-floor heights. If the shorter building is displaced toward the taller building, and the contact point is between floor heights, the contact could occur at the midpoint of a column and cause catastrophic damage. If the buildings are the same height and experience contact during a seismic event, the damage will be less significant but could cause damage at the roof/wall connection. 
Weak Story, Soft Story, Vertical Irregularities, Geometry, Mass, Torsion:
 You should recognize each of these as some of the Horizontal and Vertical irregularities from ASCE 7. These irregularities were only codified in the 1994 Uniform Building Code (UBC), so buildings designed and constructed prior to the adaptation of the 1994 UBC are more likely to have these irregularities. Also notable is that weak story and soft story are listed here separately. While they are the result of similar configurations, "weak story" relates to strength and "soft story" relates to stiffness. 
Liquefaction, Slope Failure, Surface Fault Rupture: 
 These all relate to the soil below the structure. However, we now know that the soil conditions can be a large factor in how the buildings will behave during a seismic event. Liquefaction relates to a type of soil in which the cohesion between the soil particles is likely to decrease to a point of instability when saturated. This can occur during an earthquake, as was seen specifically in the 2011 Christchurch Earthquake. Slope Failure relates to landslide hazard, which is relatively common after an earthquake. Surface Fault Rupture relates to the proximity to the closest known fault. If a structure is located very close to a fault, the building could be damaged by the surface rupture during an earthquake. Based on recent legislation, structures shall not be built immediately on top of or within 50 feet of these fault lines. 
If you have time to review the building-type-specific checklists, you'll notice some of the improvements that we discussed in the Building Code Blog Post. These checklists are designed to show how much of the modern seismic detailing can be found in these existing structures, and I think they double as a great study tool for this exam.
About the Author: Erin E. Kelly

Ms. Kelly is an experienced structural engineer with a focus on seismic risk. She has extensive experience in structural failure investigations, seismic structural design, and seismic risk assessments. Through the School of P.E., she has taught a 32-hour course for the California Seismic P.E. Exam, authored several blog posts, and contributed to other review products. She has a Bachelor of Science in Civil Engineering from Johns Hopkins University and a Masters of Engineering in Structural Engineering from Lehigh University.

Monday, 15 June 2020

How is ASCE 7 Organized for Seismic Engineering

Besides signing up for this course, obtaining a copy of and getting comfortable with the latest version of ASCE 7 is the best thing you can do for yourself to prepare for the California Seismic P.E. exam. 
This test is fast paced, so the last thing you want to spend time doing is flipping through the code to find the information you need. 
Here's a quick overview of some important sections to get you started: 
Chapter 11 
Chapter 11 is used on the exam to determine the ground acceleration parameters, site class, and seismic design category. Section 11.4 includes formulas and tables to determine the site class, and Section 11.6 contains tables to determine the Seismic Design Category. As we discuss in the course, Seismic Design Category influences so much in a building's design including, but not limited to, permitted lateral systems, maximum building heights, lateral analysis procedures, restrictions on irregularities, and seismic detailing requirements. 
Chapter 12 
Chapter 12 contains the seismic design requirements for building structures, so for most of the exam, you'll be using this chapter. This blog post is by no means comprehensive, but I'll highlight a few of the important features. 
In my opinion, one of the most important tables in the whole code is Table 12.2-1. This should always be your starting point on the exam. It outlines each type of lateral force-resisting system, its corresponding seismic parameters for ductility, overstrength, and deflection amplification, and provides guidance on the applicability or appropriate building height limit in each seismic design category. This table is useful as a personal teaching tool or point of reference and is also a great place to start on any exam question. 
Table 12-3.1 describes each of the horizontal and vertical irregularities that are considered by the code. A building with any of these irregularities will require additional analysis or the consideration of additional seismic load, so it's important to review these definitions and commit them to memory. 
Section 12.8 outlines all the parameters needed for the Equivalent Lateral Force Procedure, from the seismic response coefficient, to base shear, to period, and deflection. If the building is permitted to be analyzed by this procedure (and for the purpose of the test, 99% of structures will be) this is where all your calculations should begin. 
Section 12.12 contains limits for allowable story drift. This is an easy place to pick up some points. Table 12.12-1 includes limits based on type of structure and risk category, but if you have a moment frame structure in Seismic Design Category D through F, be sure to consider section 12.12.1.1. 
The final section in Chapter 12 worth including here is Section 12.14-the "simplified alternative structural design criteria." There are many factors that will determine if you can use this section, and typically as far as the test is concerned, they will ask you to use this section if required. It's a simple way to determine the base shear, etc. for a building if it meets all the qualifications. 
Chapter 13 
Finally, Chapter 13, or more specifically, Tables 13.5-1 and 13.6-1 provide the ap, Rp, and Ωo values for nonstructural components. These will be used to determine their anchorage forces. 
As I said, this is in no means a full guide to ASCE 7, but if you are able to tab/bookmark/highlight these sections and get familiar with them, you'll save a lot of time on the test and, let's face it, we could all use some more time for this exam.
About the Author: Erin E. Kelly

Ms. Kelly is an experienced structural engineer with a focus on seismic risk. She has extensive experience in structural failure investigations, seismic structural design, and seismic risk assessments. Through the School of P.E., she has taught a 32-hour course for the California Seismic P.E. Exam, authored several blog posts, and contributed to other review products. She has a Bachelor of Science in Civil Engineering from Johns Hopkins University and a Masters of Engineering in Structural Engineering from Lehigh University.